I finished a couple of Mules this weekend! The first is an interesting new material I decided to try out. It is called M3 Metal Composite. There are a number of different varieties you can try - but they are all composed of finely powdered metal embedded in a resin binder. The finished material is approximately 80% metal. It works like paper micarta, but you finish it like you would a metal. Interesting and fun, but I'm not sure I'll use much of it in the future. First off, it is very brittle material. It is fairly hard stuff and finishes beautifully, but the lack of a substrate (like the fiberglass in G10) makes it subject to chipping if you drop it. Second - the stuff is expensive. I laminated two sheets together for these scales - a 1/8" solid copper liner with a 1/4" copper mokume gano slab. Together, the raw materials for this set of scales was about the same price as the steel itself...
And I have to tell you - the pictures DO NOT do this stuff justice! In these pictures, it looks 2 dimensional. But up close, it looks like a lustrous metal with a cool 3 dimensional "starfield" effect when you move it in the light - it glitters and glows. Gorgeous material.
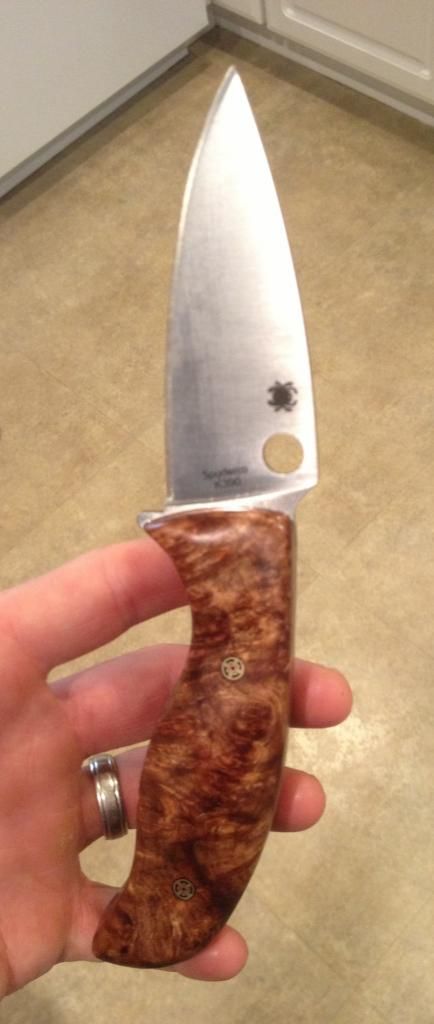
My second Mule this weekend is fashioned from stabilized Hawaiian Mango wood. I'd never used this before, and when I saw some on Burl Source, I decided to give it a try. Even though it was stabilized and fairly dense, it was extremely porous when I got it. It worked beautifully, though. It didn't splinter or chip and even though it felt soft when you were working it with tools, it is actually a very hard, durable wood. I liked it a lot. I added a 1/16" red G10 liner to the scales using West epoxy.
My challenge came when it was time to finish the scales. How to fill the huge pores without clouding the grain and luster of the wood? I decided to try using CA glue - which I had resisted using for a lot of years because of the mess and smell. The first coat, I used an extra thin glue and basically just saturated the wood. I let it cure then hit it with 800 grit sandpaper and took most of this coat off - leaving just the filler in the pores. I then used a thicker CA for a second coat, which floated over the thinner coat and sealed the wood very nicely. I hit it again with 800 grit paper and topped it off with about six thin coats of Tru Oil, sanding between coats with 0000 synthetic steel wool.
phillipsted wrote:My second Mule this weekend is fashioned from stabilized Hawaiian Mango wood. I'd never used this before, and when I saw some on Burl Source, I decided to give it a try. Even though it was stabilized and fairly dense, it was extremely porous when I got it. It worked beautifully, though. It didn't splinter or chip and even though it felt soft when you were working it with tools, it is actually a very hard, durable wood. I liked it a lot. I added a 1/16" red G10 liner to the scales using West epoxy.
My challenge came when it was time to finish the scales. How to fill the huge pores without clouding the grain and luster of the wood? I decided to try using CA glue - which I had resisted using for a lot of years because of the mess and smell. The first coat, I used an extra thin glue and basically just saturated the wood. I let it cure then hit it with 800 grit sandpaper and took most of this coat off - leaving just the filler in the pores. I then used a thicker CA for a second coat, which floated over the thinner coat and sealed the wood very nicely. I hit it again with 800 grit paper and topped it off with about six thin coats of Tru Oil, sanding between coats with 0000 synthetic steel wool.
TedP
Nicely done Ted liking them even more now your using liners .
Those Torx screws look the part too , my Elmax is still at factory edge and cuts like a demon .
I know a few have taken it down to 19-20• and have stated it becomes a different animal super scary sharp .
As much as I love burl stabilised wood on a mule , the two I own are both burl , horse chestnut and English walnut .
That Kirinite looks fantastic .
Will be getting the MT 18 hopefully and that will be Kirinite .
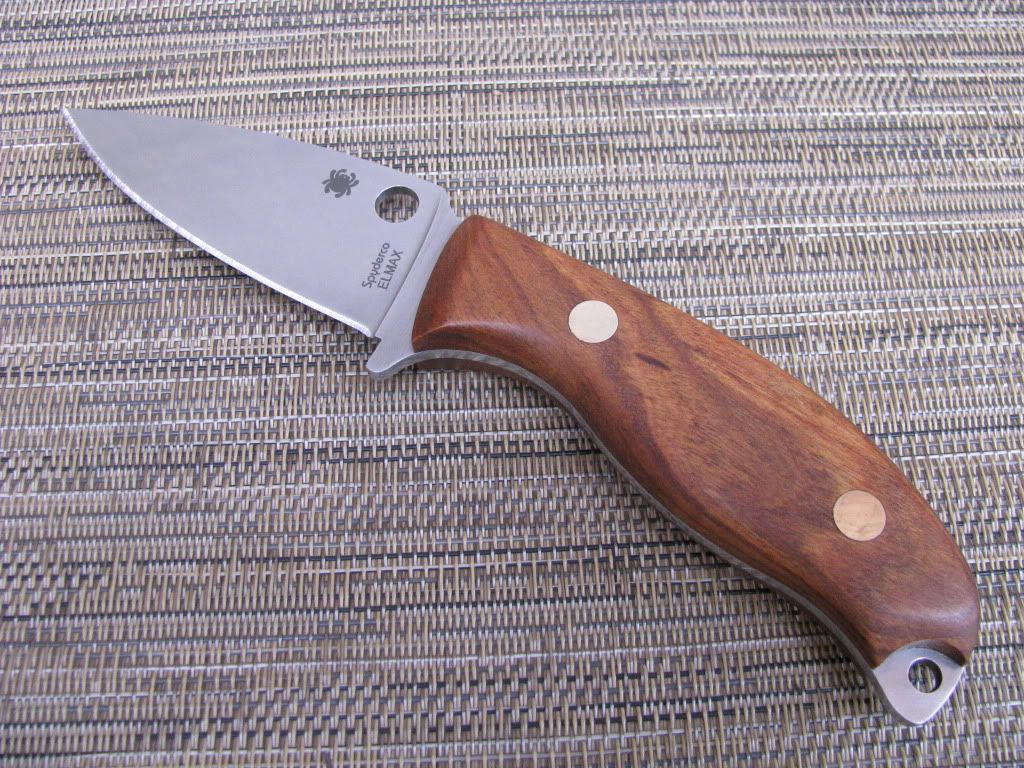
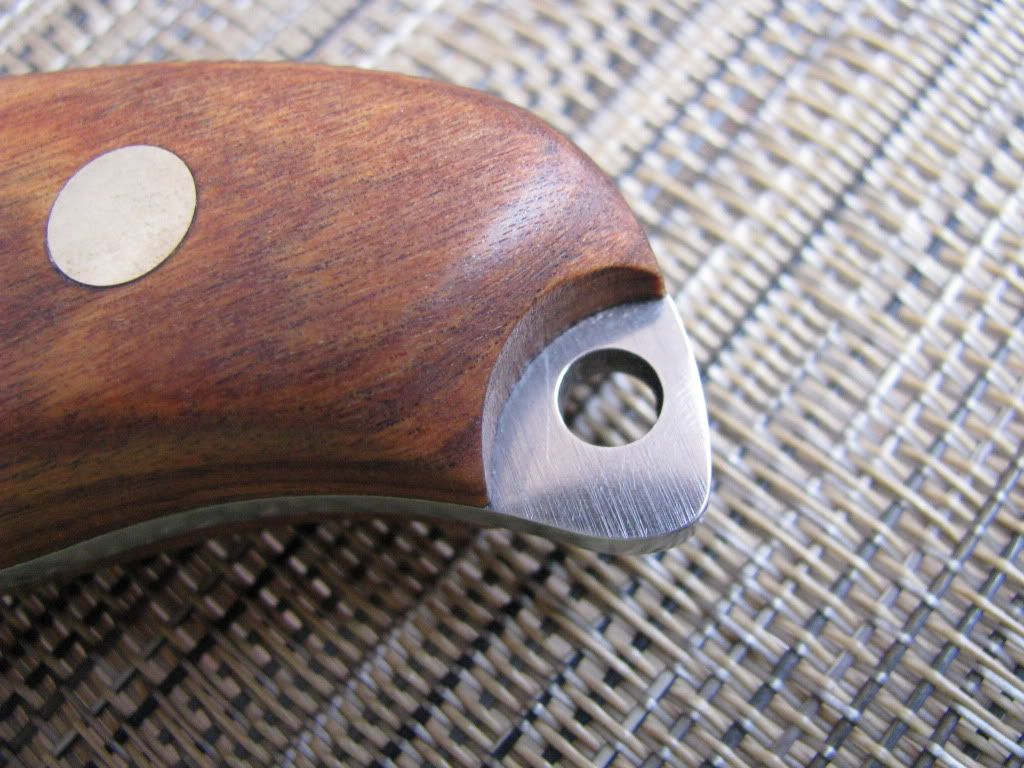
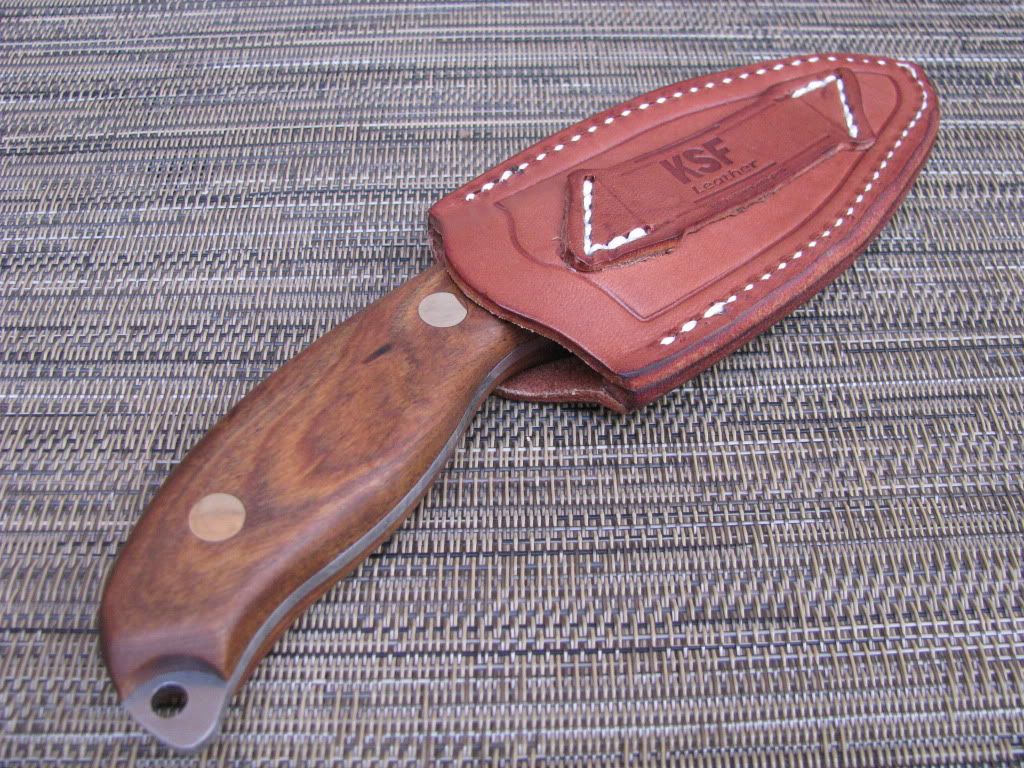
Brock O Lee wrote:My first Mule - Elmax in Tambotie (local version of Cocobolo, if I understand correctly). Its a hard and oily wood, but it was easy to work with.
Sheath is from KSF (Clovis pouch).
I even got a friend from work and my father-in-law interested in the Mule project. Their first Mules are also finished (in African Blackwood and Tambotie).
What an addictive hobby - I can see myself making many more...
Cant seem to find this sheath? Is it small, large? Any help?
Thanks,
fernny1 wrote:Cant seem to find this sheath? Is it small, large? Any help?
Thanks,
The Clovis pouch was available from Knives Ship Free (KSF), but I don't see it on their web site any more. It was a pouch more than a sheath, though. It didn't have a welt, so you risk cutting through the leather if you insert the blade too forcefully. KSF has a whole selection of sheaths to choose from, though - several of which would fit a Mule.
phillipsted wrote:The Clovis pouch was available from Knives Ship Free (KSF), but I don't see it on their web site any more. It was a pouch more than a sheath, though. It didn't have a welt, so you risk cutting through the leather if you insert the blade too forcefully. KSF has a whole selection of sheaths to choose from, though - several of which would fit a Mule.
TedP
Thank you i will see what i can come up with. Does anybody have any suggestions?
Working on my ebony scales, need better lighting for this stuff, it soaks up too much light! Here's the Halpern scales that arrived today. I ordered an extra set of pins and have the ebony scales shaped, first coat of oil is in place now. I'm going to redo the curve at the blade, don't like what I've done with it, but at least I's too long and not too short. Once this is finished, I'll get started on the sheath, basic black, of course.
I finished up this Mule project today. My MT-07 needed a fresh set of scales and I decided to try a new wood from Mark at Burl Source - a slab of stabilized cascara sagrada, sometimes known as buckthorn. I was trying to use the wave-like flame in the wood to echo the ripples in the damascus blade. I'm not real enamored with the overall effect with this steel... but the wood itself is absolutely gorgeous. You can't really see it in the pictures, but the cascara is almost translucent - it sparkles, flames and shimmers in the light. This three dimensional iridescent quality is referred to as chatoyance - and the pictures don't do it justice. The cascara worked very well in the shop. It didn't splinter or chip out and was relatively hard. I sanded the wood out to 2000 grit and then put a coat of Renaissance Wax on top. Great stuff to work with!