G10 Sanding And Polishing

Discuss Spyderco's products and history.
User avatar
Ranger_Ike
Member
Posts: 598
Joined: Wed Oct 13, 2021 8:21 am
Location: Southern Indiana

G10 Sanding And Polishing

#1

Post by Ranger_Ike »

I've been asked a few times to post my method for contouring and polishing g10 scales, so this is an attempt at that. I'm not used to trying to document while doing this, so sorry for the poor quality.

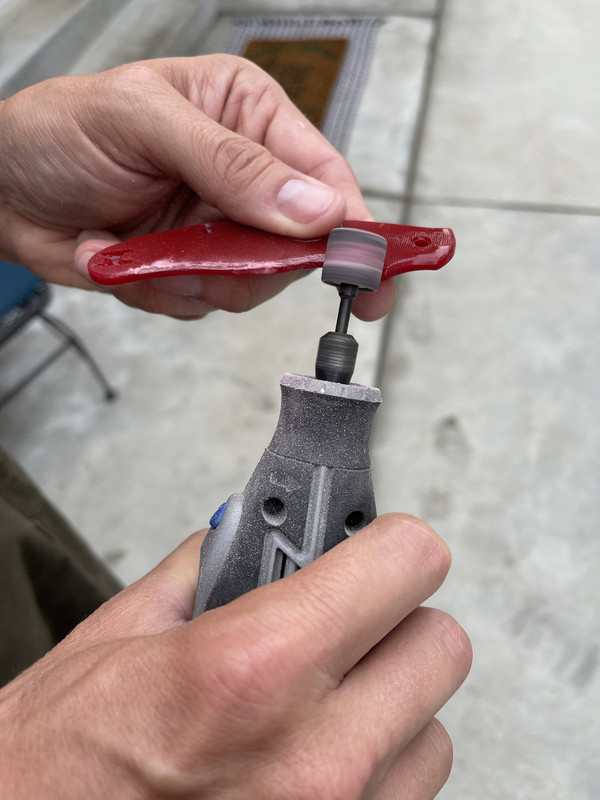
I start off by using a dremel with a barrel sander attachment. I'm not sure the grit on this, but if I had to guess I would say around 220. I was using a cup of water and kept dunking the scales in to keep them wet and help keep dust down. I did this outside and was wearing a mask. I hear the dust from this stuff is bad for you. I also wore an apron to keep the splatter and dust off of my clothes. The dremel makes a mess as it spins the stuff right towards you. Being left handed might help you here!

Image

The dremel is used to get the basic shape I want. I start by taking off the sharp edges all the way around.

Image

I don't post videos on Youtube, but here is an attempt to show a small part of the process:


Once the corners are knocked off I begin fading the edges over to round them off. I do this by making passes, each time getting closer to the edge. It's best to use long strokes to try and keep from making grooves or divots.

Every so often I stop and compare to the original to see my progress.

Image

Image

Image

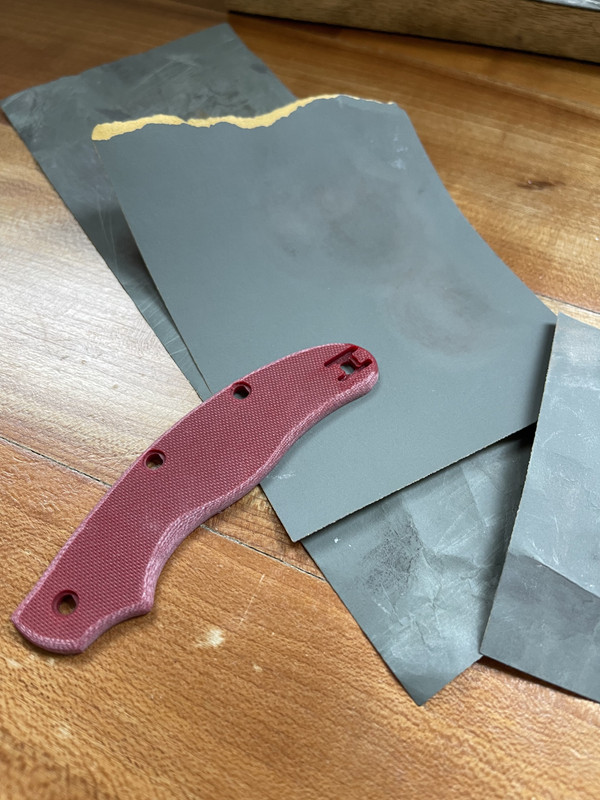
After I get them shaped I bring them inside and begin sanding under a trickle of water. I started with 220 grit. This is the place that all the edges get smoothed over and I make sure there are no harsh lines. Everything gets faded in. I also sand down the main area during this stage.

Image

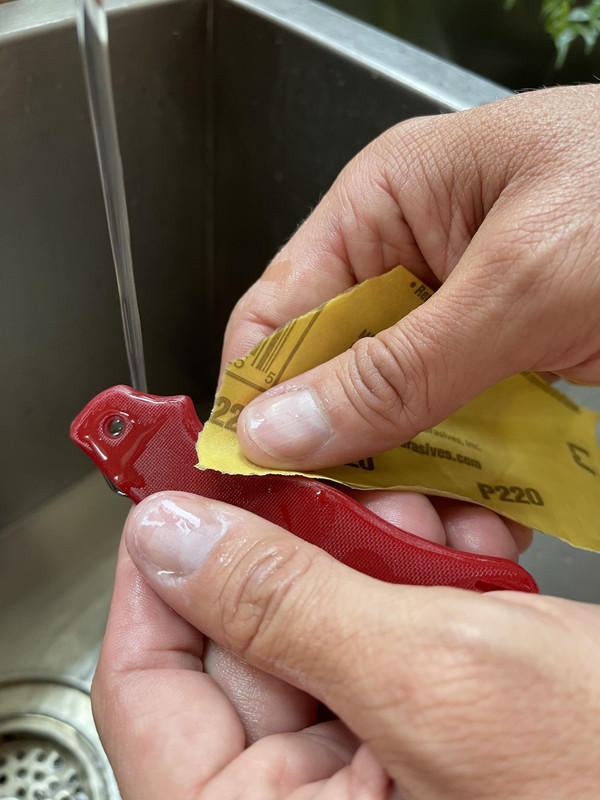
I then move to 2000 grit. Most people would probably go up in smaller increments, but I didn't have anything in between... It seems to be fine. I go over everything with the 2000 for a while, until I feel the sanding marks are out and it's smooth. You can see in this picture the fibers starting to show up white... more on this later.

Image

After the 2000 grit, I use Mother's Mag wheel polish on a microfiber rag. This adds the shine to the g10.

Image

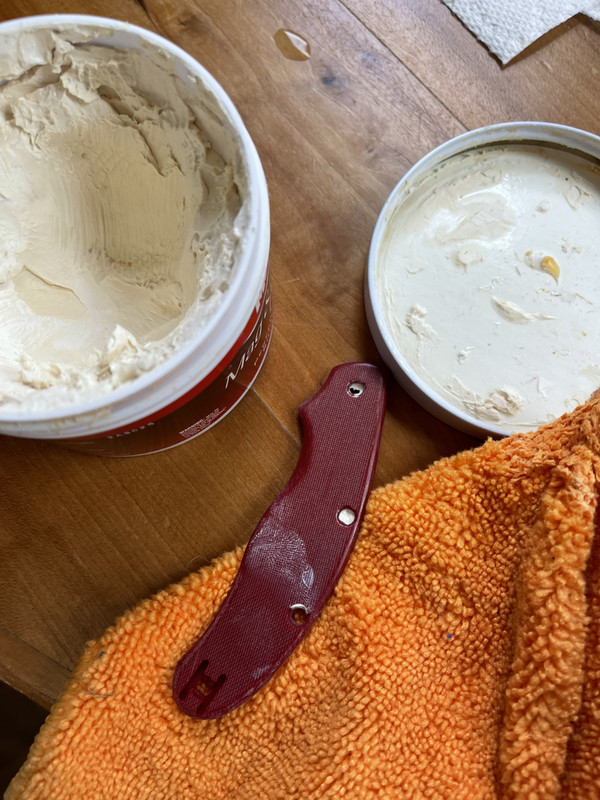
After polishing I use a toothbrush and soapy water to clean the polish out of all the grooves and holes in the scales. That is the final step. I mentioned earlier about the fibers starting to turn lighter or white. In the past I would remedy this by using rit dye to even things out. I was curious this time if it was just the fibers getting dried out in the process, so after i was finished I cleaned the scales I used alcohol to make sure all the grease and residue from the polish was gone, and then coated them lightly with baby oil. I let the baby oil soak and then wiped off the access. I let them sit and then wiped them down again with a clean towel. This actually ended up giving everything an even color. I am going to carry it and see if the fibers start to loose color again, but after a few hours they are still good.

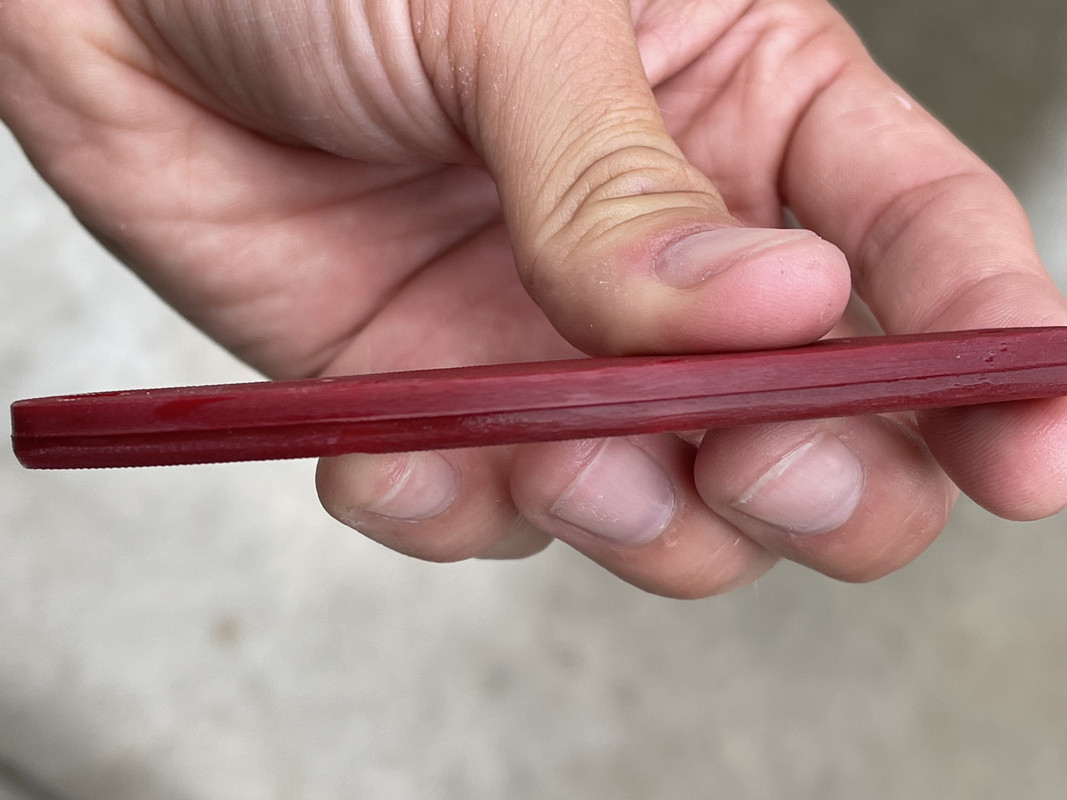
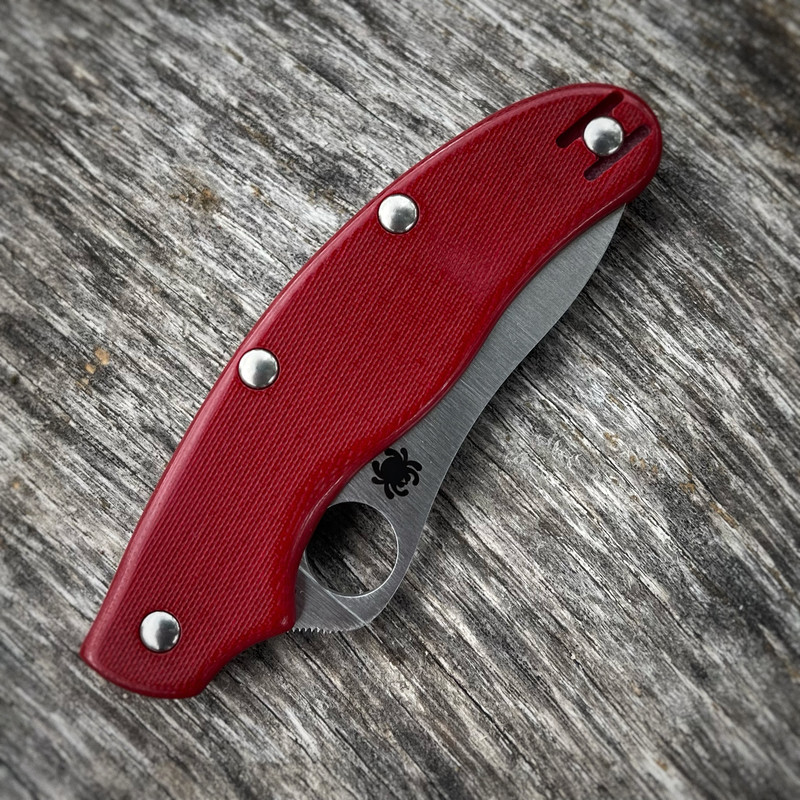
One thing to note is that the back spring is now slightly proud of the g10, but not a lot and it doesn't bother me. Just be careful how much material you remove, especially during the dremel stage.

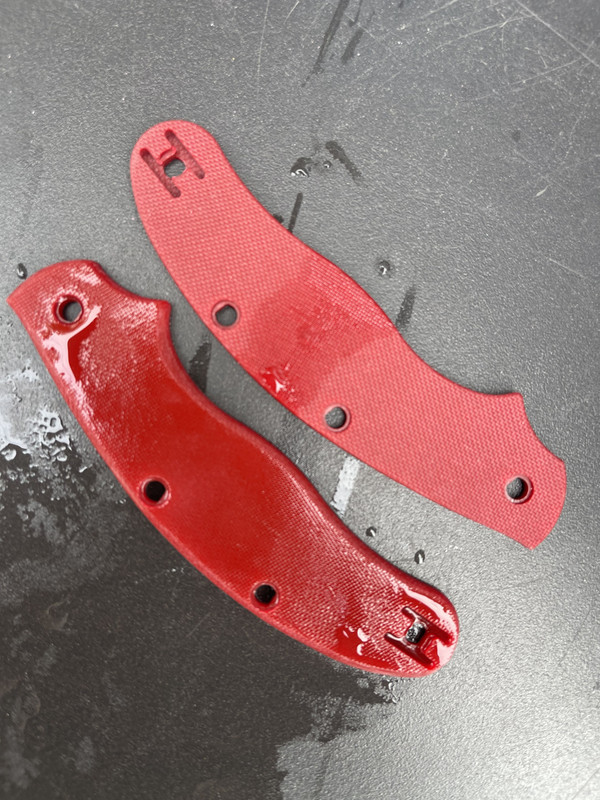
A few pics of the finished scales:

Image

Image

Image

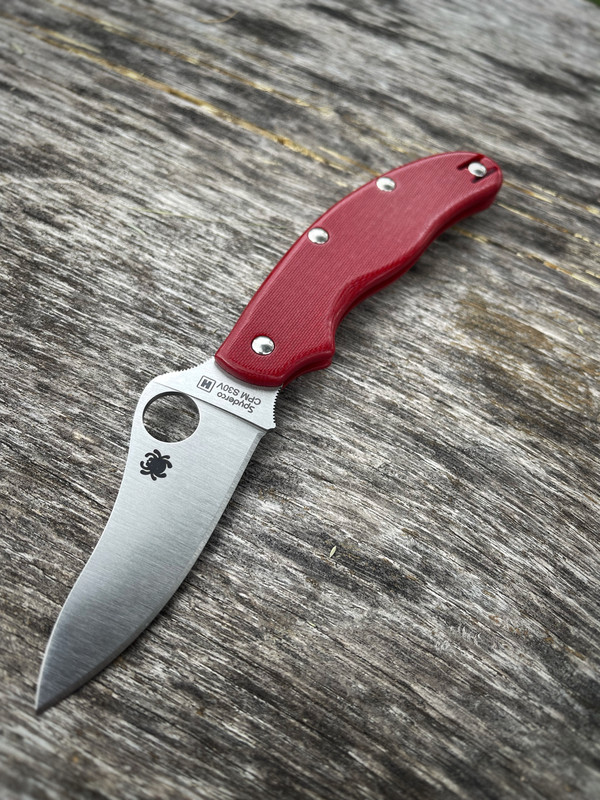
Feel free to add any G10 contouring or polishing mods and your methods. Hopefully this helps someone out there who wants to give it a try. It's an easy process, just take your time.

Edited to fix grammar problems
Last edited by Ranger_Ike on Sun Sep 11, 2022 5:56 pm, edited 1 time in total.
User avatar
Xformer
Member
Posts: 459
Joined: Wed Mar 21, 2018 4:33 pm

Re: G10 Sanding And Polishing

#2

Post by Xformer »

Thorough!

Thanks mate, it's a really good tutorial. You put a huge effort into it. I'll try it.
User avatar
ChrisinHove
Member
Posts: 4081
Joined: Tue Dec 17, 2013 8:12 am
Location: 27.2046° N, 77.4977° E

Re: G10 Sanding And Polishing

#3

Post by ChrisinHove »

Very neat!

I polished the extra course g10 of the HH Urban by hand. I used wet&dry in a trough of water to avoid any risk of dust release, but it took ages!
Soanso McMasters
Member
Posts: 557
Joined: Thu Oct 07, 2021 3:07 am

Re: G10 Sanding And Polishing

#4

Post by Soanso McMasters »

I may have to try this on a Native. Thanks for sharing!
User avatar
Fly Fishing Rick
Member
Posts: 780
Joined: Tue Jul 05, 2022 7:54 am
Location: Upstate NY

Re: G10 Sanding And Polishing

#5

Post by Fly Fishing Rick »

Thanks for the detailed write-up.
-Jimmy
User avatar
Manixguy@1994
Member
Posts: 12623
Joined: Fri Jun 10, 2016 12:12 pm
Location: Central Illinois
Contact:

Re: G10 Sanding And Polishing

#6

Post by Manixguy@1994 »

Excellent post and thank you for sharing , very well written and illustrated. Dan
MNOSD 0002 / Do more than is required of you . Patton
Nothing makes earth so spacious as to have friends at a distance; they make the latitudes and longitudes.
Henry David Thoreau
User avatar
JacksonKnives
Member
Posts: 837
Joined: Thu Jan 10, 2008 8:28 pm
Location: Alberta, Canada
Contact:

Re: G10 Sanding And Polishing

#7

Post by JacksonKnives »

Ranger_Ike wrote:
Sun Sep 11, 2022 2:08 pm


One thing to note is that the back spring is now very slightly proud of the g10, but not a lot and it doesn't bother me. Just be careful how much material you remove, especially during the dremel stage.
One trick to help control how much you're removing is to paint edges. Use something waterproof that will also clean off with alcohol--e.g. sharpie marker.
The contrast helps you see the "line" you're making while rounding edges and make sure you don't knock off the corner next to the liner. If you want to get really fancy, you could even measure exactly how close to the liner you want to round, then draw a line there with a height gauge--maybe some stacked up coins and modeling clay to hold the sharpie at a fixed height off a table.

A note about smoothing/polishing the peel-ply texture off but leaving the scale flat: if you just want an even color, you need to be sure you're evenly removing one layer at a time.
G-10 is made up of layers, so if your sanding method makes low spots, you'll get obvious circles or even "islands" if you take away more on edges by slightly rocking the scale while sanding.
I've had reasonable success glueing sandpaper to a glass plate and carefully scrubbing the scale in figure-8 or star patterns, but it really helps to have some kind of handle or jig that applies perfectly even pressure.
—Daniel Jackson
1penge
Member
Posts: 23
Joined: Mon Jul 11, 2022 1:00 pm
Location: Canada, North of the Big Smoke

Re: G10 Sanding And Polishing

#8

Post by 1penge »

Thanks Ranger Ike, for your excellent step-by-step instructions. You produced beautiful results on those HH G10 UKPK scales.

The scales on my Heinnie Haynes Red G10 Urban were so roughly textured that they've quickly shredded my jean pockets. I had thought of smoothing out the scales by hand (using various grades of wet/dry paper), but bought a set of Vapour Puffin sculpted carbon fibre slabs from the UK instead.
Perhaps I should invest in a Dremel tool & give my red scales a go.

I would also love to hear how Chris Hove refinished his aggressive red G10 Urban scales by hand.
User avatar
Ranger_Ike
Member
Posts: 598
Joined: Wed Oct 13, 2021 8:21 am
Location: Southern Indiana

Re: G10 Sanding And Polishing

#9

Post by Ranger_Ike »

Thanks to everyone for the kind words. I really enjoy the process of sanding and shaping the scales.
User avatar
Ranger_Ike
Member
Posts: 598
Joined: Wed Oct 13, 2021 8:21 am
Location: Southern Indiana

Re: G10 Sanding And Polishing

#10

Post by Ranger_Ike »

JacksonKnives wrote:
Sun Sep 11, 2022 4:12 pm
Ranger_Ike wrote:
Sun Sep 11, 2022 2:08 pm


One thing to note is that the back spring is now very slightly proud of the g10, but not a lot and it doesn't bother me. Just be careful how much material you remove, especially during the dremel stage.
One trick to help control how much you're removing is to paint edges. Use something waterproof that will also clean off with alcohol--e.g. sharpie marker.
The contrast helps you see the "line" you're making while rounding edges and make sure you don't knock off the corner next to the liner. If you want to get really fancy, you could even measure exactly how close to the liner you want to round, then draw a line there with a height gauge--maybe some stacked up coins and modeling clay to hold the sharpie at a fixed height off a table.

A note about smoothing/polishing the peel-ply texture off but leaving the scale flat: if you just want an even color, you need to be sure you're evenly removing one layer at a time.
G-10 is made up of layers, so if your sanding method makes low spots, you'll get obvious circles or even "islands" if you take away more on edges by slightly rocking the scale while sanding.
I've had reasonable success glueing sandpaper to a glass plate and carefully scrubbing the scale in figure-8 or star patterns, but it really helps to have some kind of handle or jig that applies perfectly even pressure.
That’s a good tip. Might have to try that next time to better know how much I’m taking off at the edges.
User avatar
nerdlock
Member
Posts: 1950
Joined: Sun Jul 19, 2020 3:43 am

Re: G10 Sanding And Polishing

#11

Post by nerdlock »

Thank you for the thorough tutorial and I'm sure many will benefit from this. Though I always wonder why Spyderco doesn't make bigger bevels on their Golden-made knives versus the Seki ones. I just wish they'd add better chamfers right out of the factory; really adds another level of user comfort in addition to the ergonomics.
8Cr13MoV:N690Co:VG10:S30V:S35VN:S45VN:Elmax:SPY27:H1:LC200N:4V:MagnaCut:CTS-XHP:204P:M390:20CV:Cru-Wear:Z-Wear:M4:Rex-45:10V:K390:15V:S90V:Z-Max:Maxamet
User avatar
kennethsime
Member
Posts: 4786
Joined: Thu Dec 29, 2011 8:28 pm
Location: California

Re: G10 Sanding And Polishing

#12

Post by kennethsime »

Very cool - thanks much for sharing your process! I think I need to get myself a Dremel tool.
I'm happiest with Micarta and Tool Steel.

Top four in rotation: K390 + GCM PM2, ZCarta Shaman, Crucarta PM2, K390 + GCM Straight Spine Stretch.
Post Reply