
Also to be clear, I did not do all this because my spring failed...so while I did want to do a bit of a review on the spring kit, it was only out of curiosity and not necessity, I reinstalled my original factory spring and mostly just wanted to show what the kit came with.

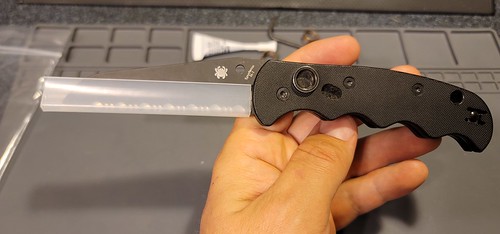
The main components of the kit are two replacement springs, a torx wrench, and a spring compression key/tool. You also get some thread locker and a cool edge protector sleeve thing since this spring can be replaced without taking the knife apart and you need to do so with the blade open, so it's a cool addition that Spyderco adds to help keep you safe while you're working. I like this WAY more than I thought I would, it's effective and faster and easier than painter's tape.
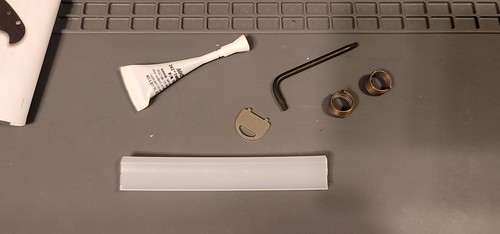
Something of note, the Torx wrench only fits the pivot screws, and is not enough to fully take the knife apart. In full you'll need a T10 for the pivot screws, a T8 for the scale/body screws and clip screw, and then a T6 for two small screws on the back side of the scales near the pivot. These two small screws help to keep the scale held down around the pivot because unlike most knives there isn't a back side pivot screw that presses into the scale/liner to hold everything together.
Lastly they offer up some instructions for replacing the spring. This is a pretty unique bit of Spyderco Edge-U-Cation, I'm not aware of any other paperwork that offers actual instructions for taking apart and reassembling any Spyderco product. Given the old "disassembly voids your warranty" policy it's a pretty unusual piece of Spyderco history.


As for servicing just the spring, it's very simple to do. It's no surprise that Spyderco won a Blade Show award for this design, it's pretty brilliant when you compare it to how complex other automatics are.

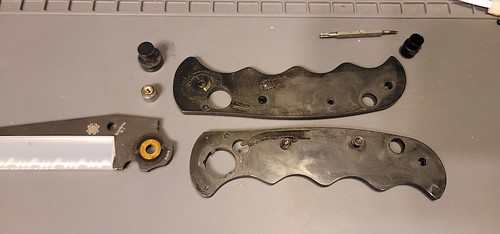
Anyway, here it is taken apart, all except for the scales of course. I've rinsed this knife out and cleaned it with Q-tips but this is the remaining crud from 5 years of carry and use.
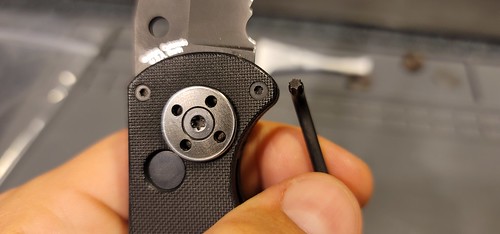
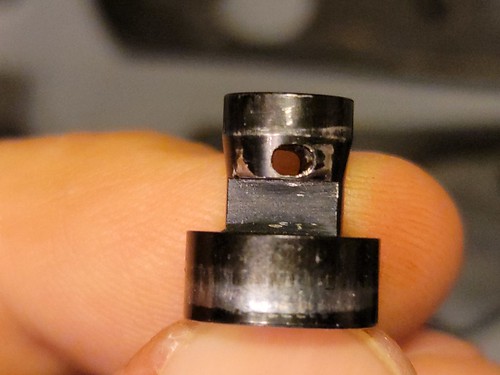
Alright, on to the button wear issue.
Or in my case, the lack thereof. The button does show some wear, but I would see it more as "break-in wear" than "wearing out". This first pic shows the button as I pulled it out before wiping it off. I don't think any of this is metal dust and is more pocket lint, but again I've rinsed this knife out a hundred times over the years so if there ever was any metal dust it surely got washed out by now.

And here it is wiped off.


My first thought was that maybe the button on the DLC version is coated in DLC, and that helped to slow down or reduce wear. On the other hand, I have my suspicion that the hardware on these knives is coated in something lesser quality than actual DLC, because the edges of my scales are showing a lot of scratches and wear while the blade has been through **** and barely shows a scratch. I could see them using a less expensive coating to save cost on parts that won't see the kind of wear and abuse that a blade will see. On the other hand, DLC is apparently harder than steel, so it would make sense that coating the button would slow down wear, wouldn't it?
Getting this knife back together is an exercise in finger gymnastics. There are so many pieces that need to be in their place before you sandwich it all together, one of the more frustrating parts is the stop pin that wants to fall out and get lost. I added a little dab of grease to help hold it in place and that helped. I didn't take any pics of the reassembly because I misplaced my third hand, but the basic steps I took are:
1. Assemble the front scale, including the pivot bushing and washer.
2. Set the stop pin and lanyard tube in place on the front side scale.
3. Slip the fire button into the front side scale from the bottom/front, and put the blade onto the pivot. The button must be aligned so that the spot that it locks onto the blade is in the right position.
4. You can half way assemble the back side scale/liner, but only put the two small screws up by the pivot in. The two body screws will be later once you have it all sandwiched together.
5. Taking the front side scale in your left hand (or right if you're a lefty), and the back side scale in your other hand, you need to first slip the fire button spring bar into the fire button before sandwiching everything together. There's only one right way to do this so make sure you get it right. You could potentially flip the fire button around 180 degrees but it won't fire or lock correctly so pay attention to how the button is rotated and slip the spring through the little hole in the botton.
6. With the spring bar in place in the fire button, work on lining up the fire button and lanyard tube into their holes on the back side liner. This is the most tedious part because so many things need lined up correctly before it'll sandwich together, and you'll be working against the spring bar tension too. Once the fire button and lanyard tubes are in place in the back side liner holes, you should be clear to smoosh it together, and then you can put one of the back side body screws in place and that will hold it all together. Once you're sure everything is together correctly, put the last body screw in and you're almost finished.
7. Lastly you need to put the spring back together and assemble the back side of the pivot cap. Of note here, this knife only uses one washer, which really freaked me out because I was sure I lost one but the back side of the blade actually rides on the inside rim of the pivot cap that covers the spring. I added some grease to that surface for good measure. If you just follow the instructions on assembling the spring, it's very simple. The first time I did this, I didn't have the spring compressor key thing and I just used my thumb to press and turn the cap and get it seated. It's a little weird but once you figure it out it's quite simple. Again, very ingenious design.
Lastly, just wanted to show this thicc boy pivot bushing. I know a Military/Para 2 pivot are on the larger side but I don't know if they're this big.

And here she is all clean and greased and wiped down with some Tuf-Glide for good measure.

This spring kit is currently listed as out of stock, hopefully it's not discontinued. If you're at all interested in these knives I would highly recommend picking up a couple of these kits. Little bits like this tend to be hard to find used 20 years after they're discontinued.
 !
!

