Mule tutorial using the router table

A place to share your experience with our Mule Team knives.
Hector Castro
Member
Posts: 411
Joined: Fri Sep 11, 2009 7:26 pm
Location: DFW Texas

Mule tutorial using the router table

#1

Post by Hector Castro »

This is my tutorial for using a router table to make a template for cutting multiple scales. I purchased 5 mule team knives. I wanted a fast and easy way to duplicate scales. This only works for one pin location. Multiple jigs/templates would have to be created for different pin configurations. I will be giving 3 of them away as Christmas gifts, and these will all have the same pin location with a lanyard hole.
'
please share your thoughts, and ask questions.


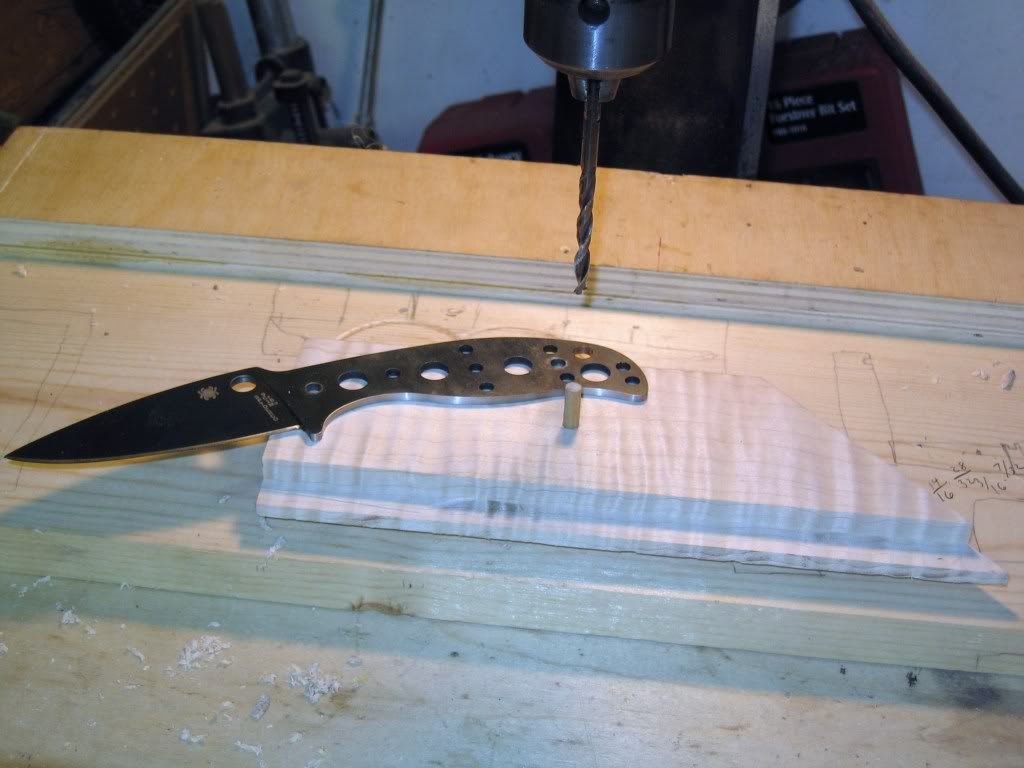
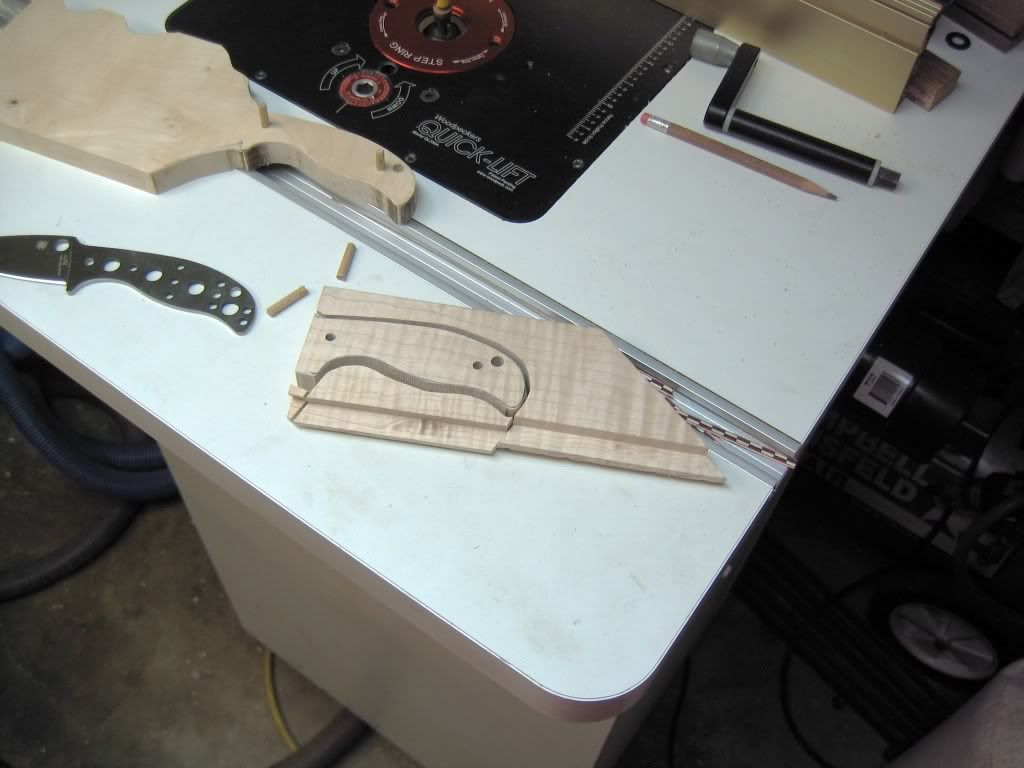
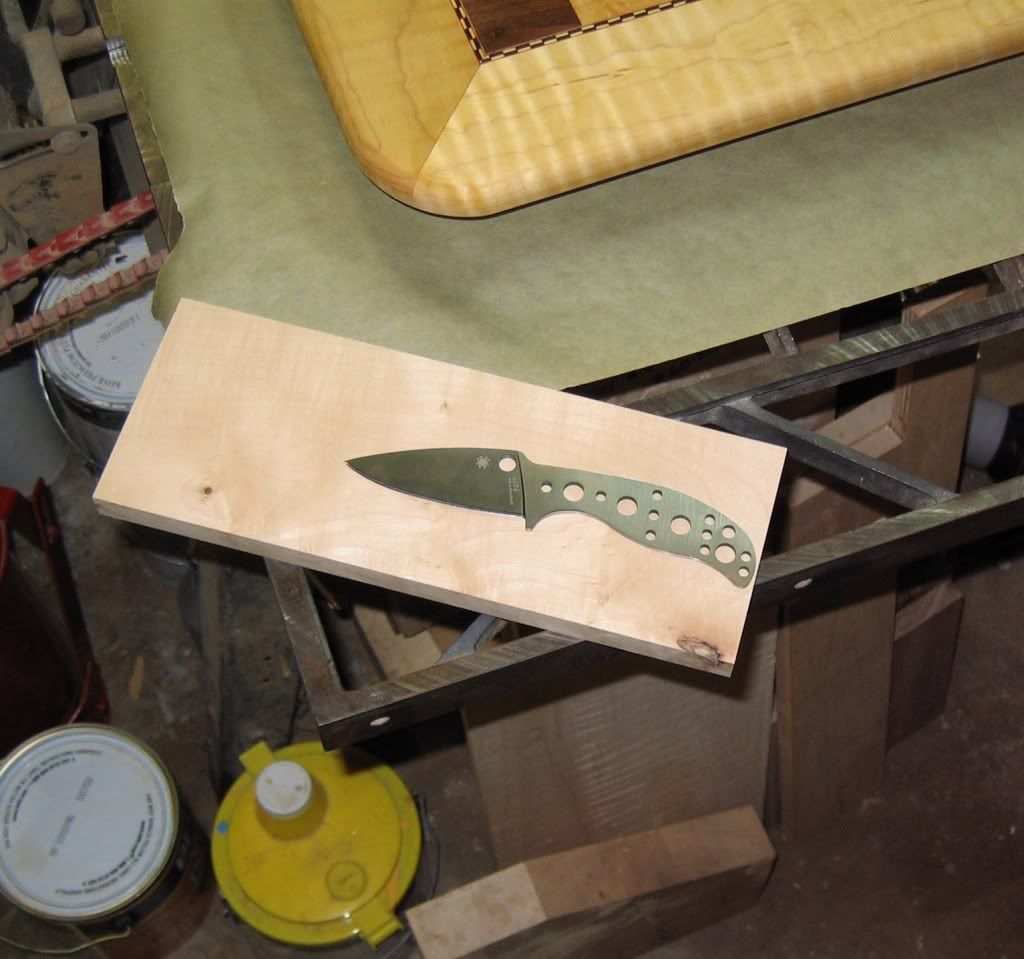
I first got a piece of wood, larger than the blade and made sure it was flat and the top is parallet to the bottom.

Image

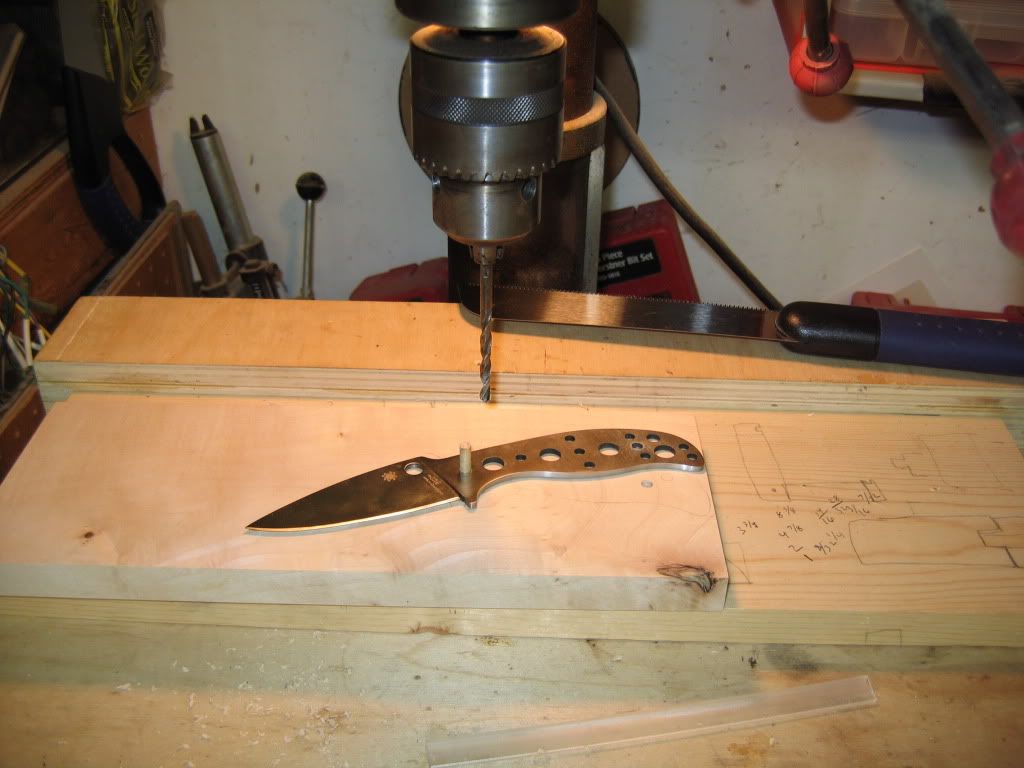
I then use the drill press and blade to align and drill the first hole, then insert a 3/16 dowel before drilling the second hole. I use the knife blank as a template to drill the second hole.

Image

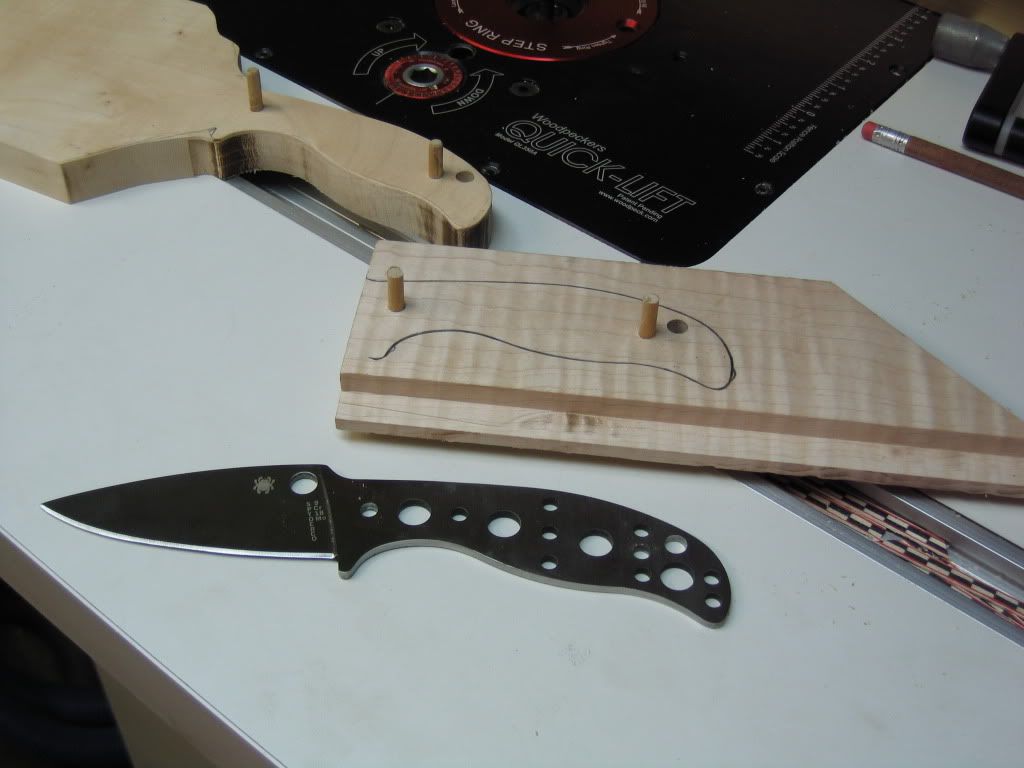
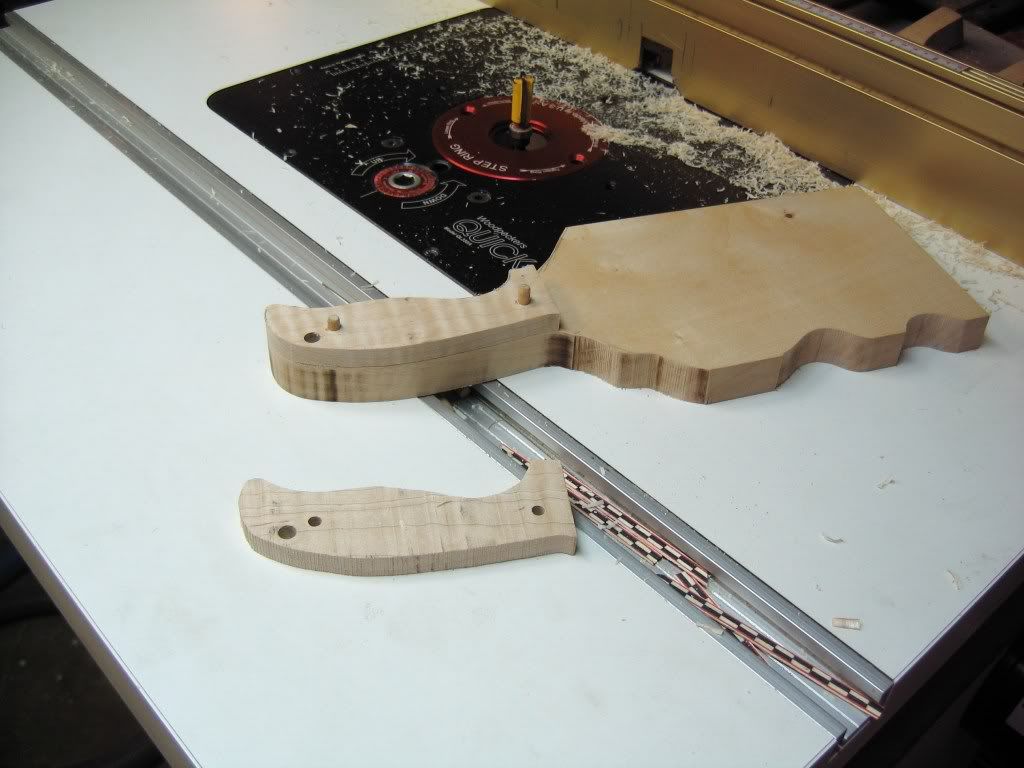
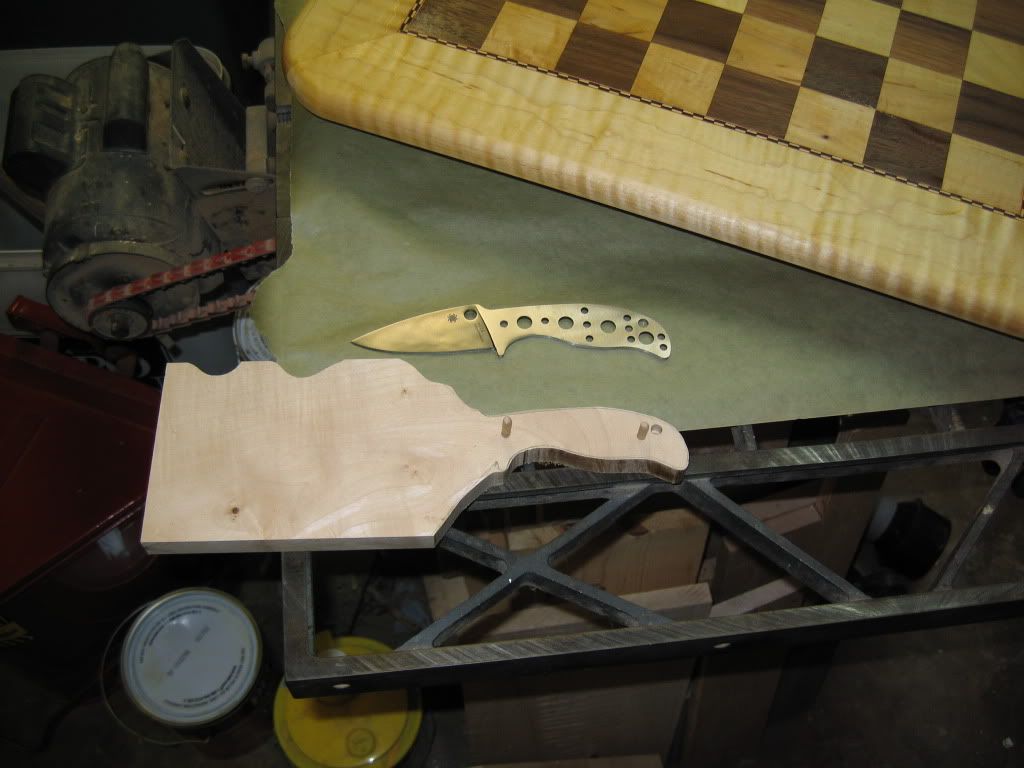
I then trace around the blank with a pencil and cut out a rough shape on the band saw.

Image

Image

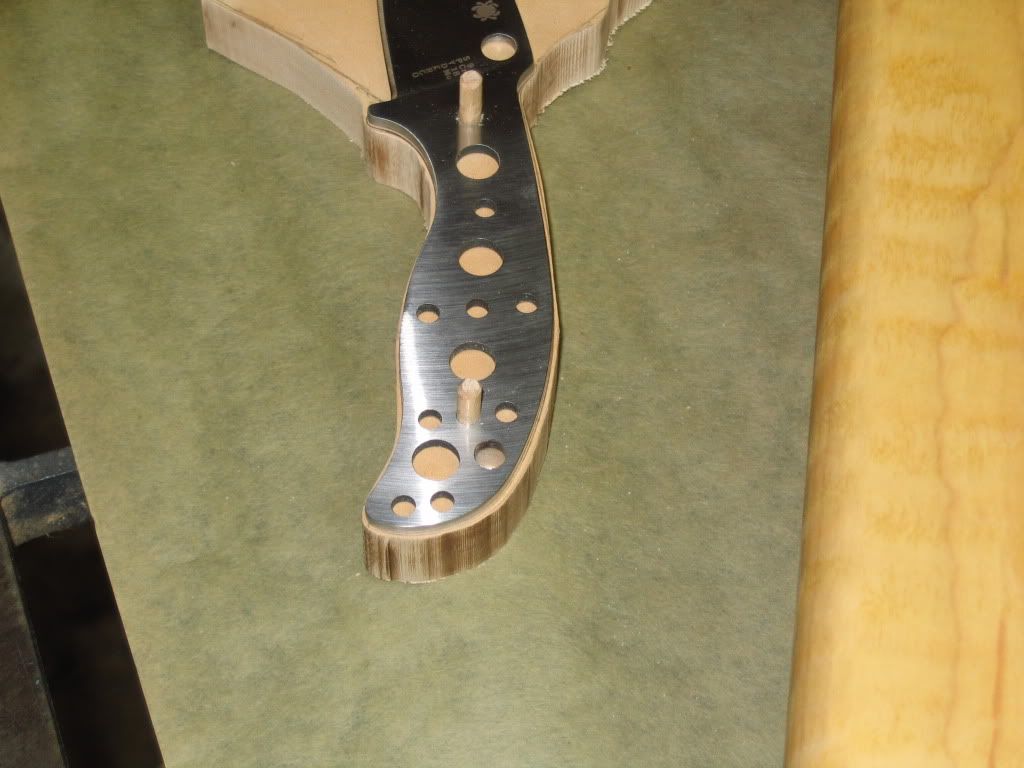
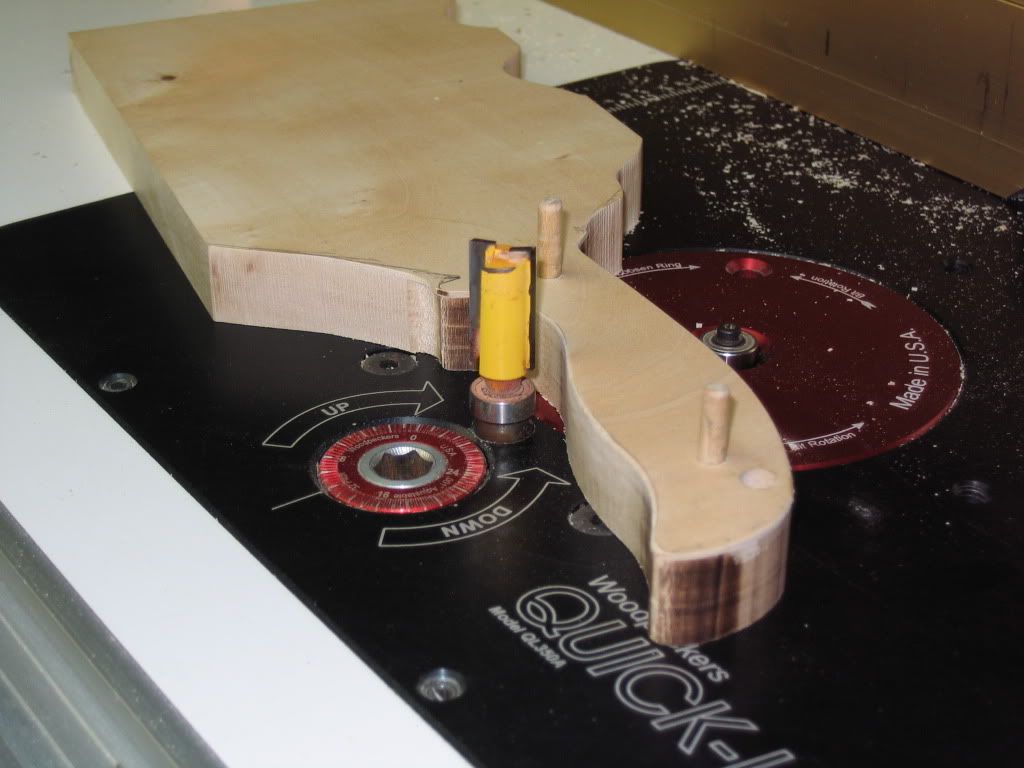
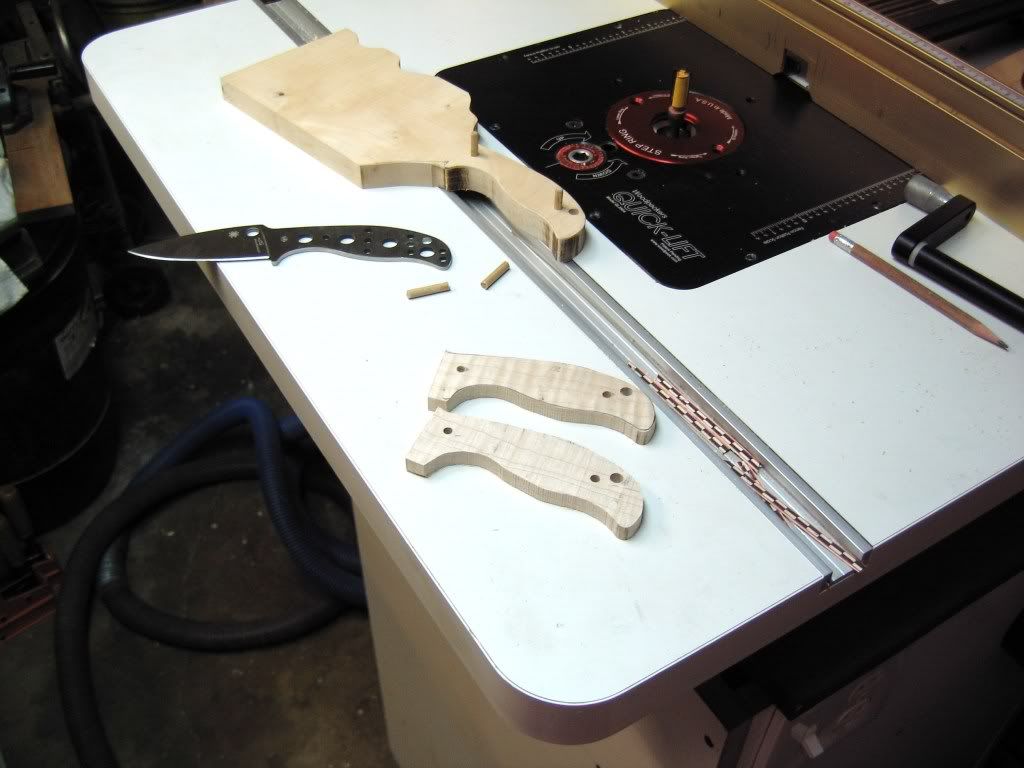
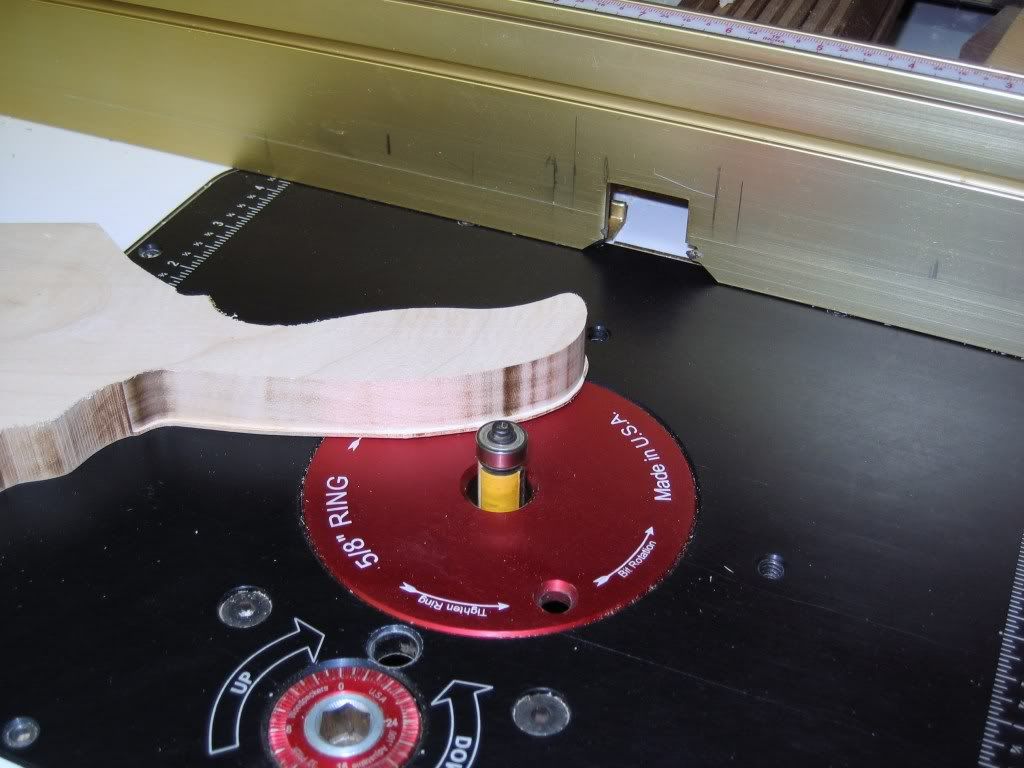
I then use a flush cut bit in the router to cut the template to match the knife blank.

Image

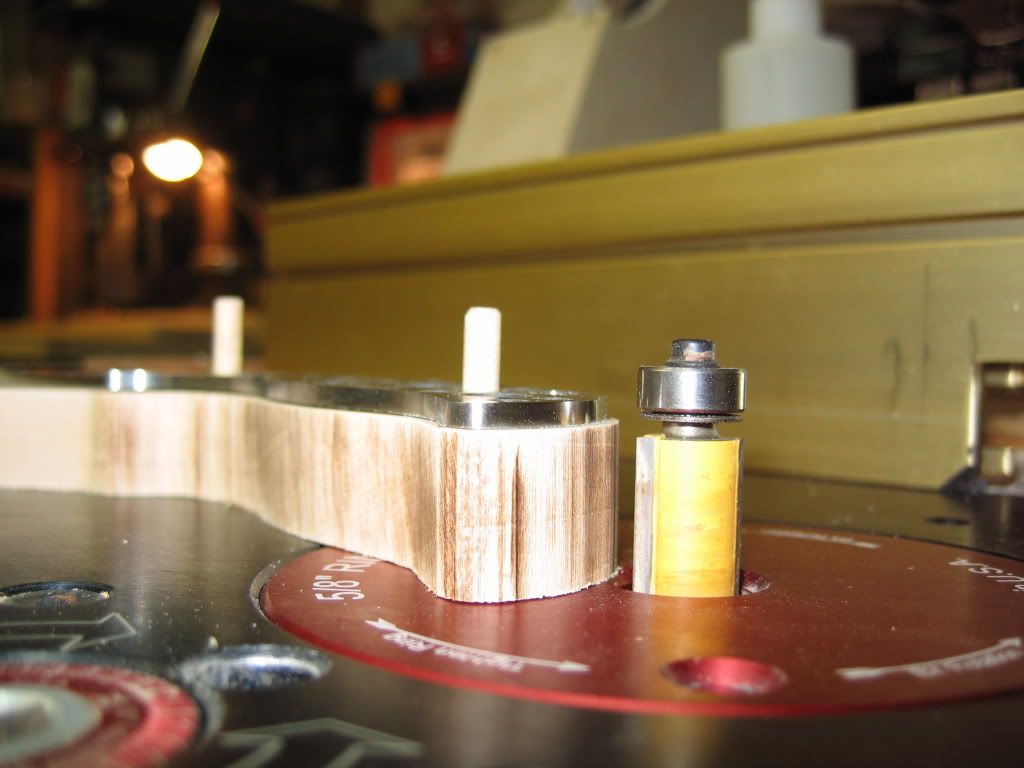
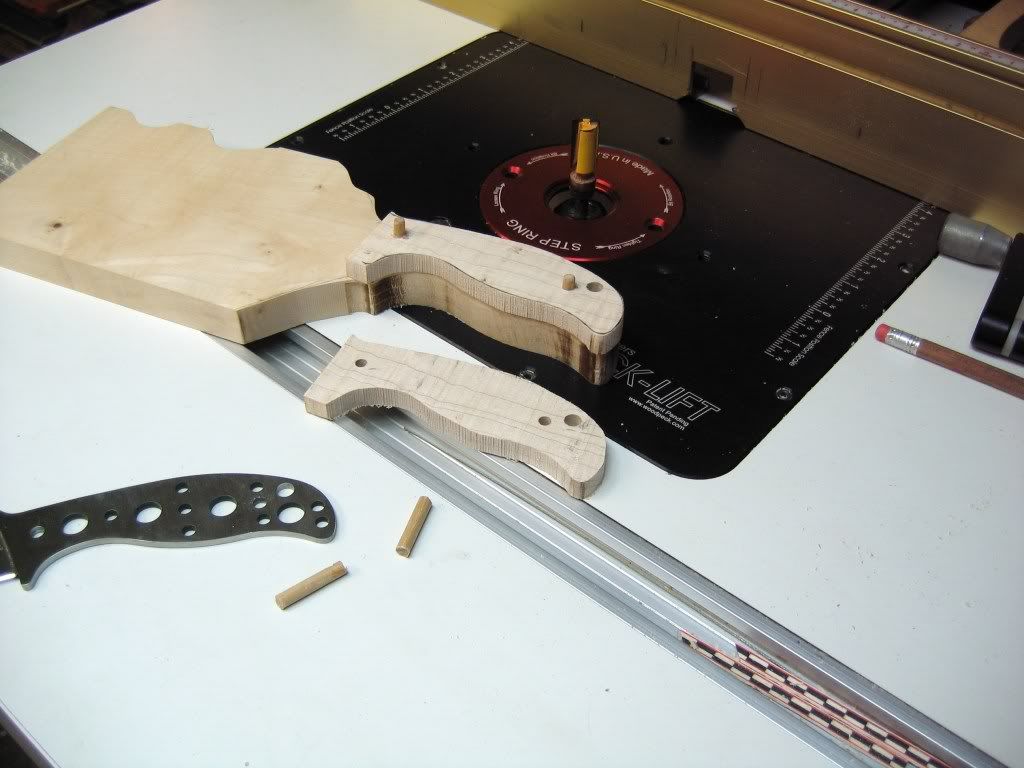
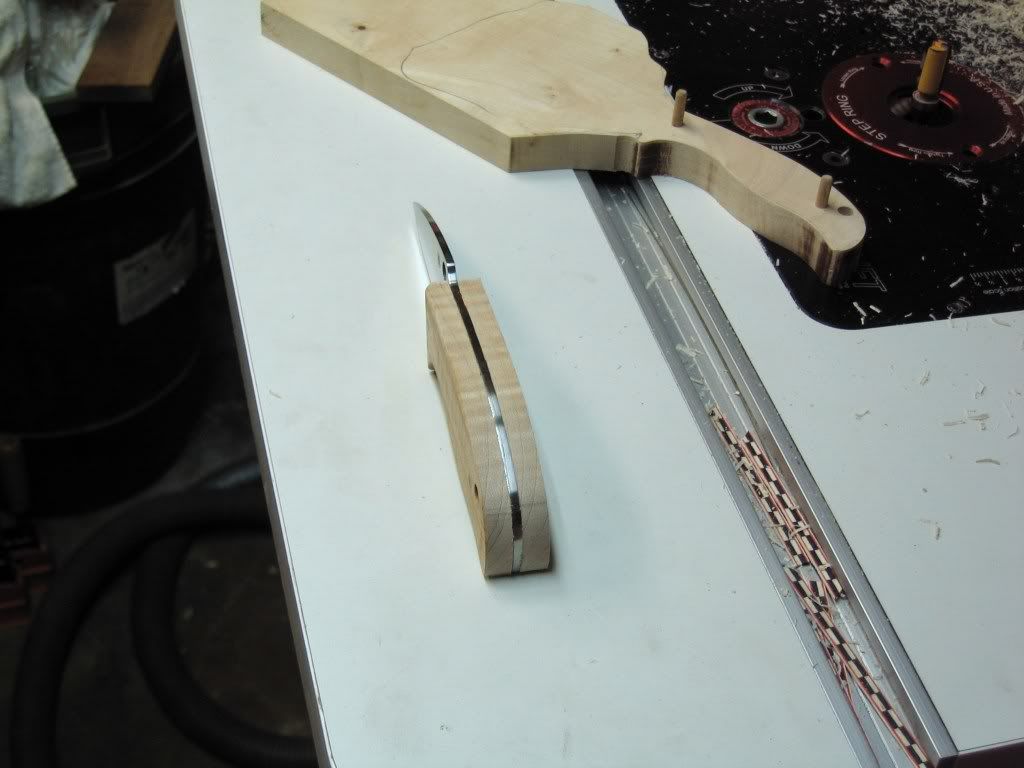
The gap between the bearing and bit cause a lip to be left. I pull the pins out of the template and flip it over to cut this off.

Image

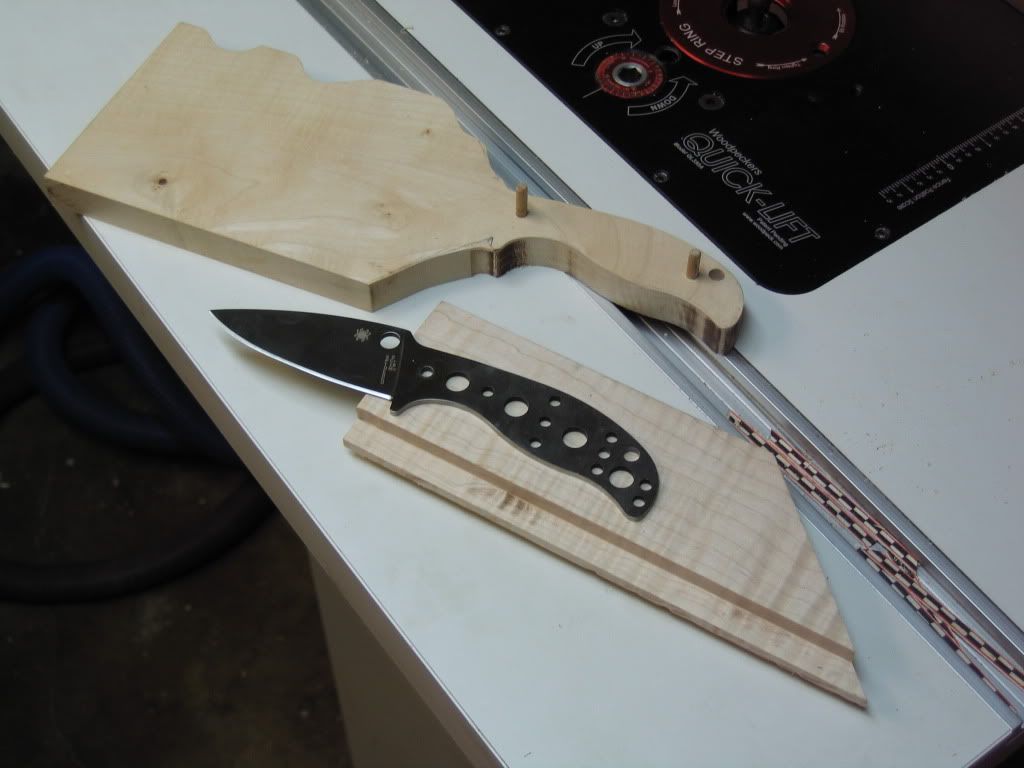
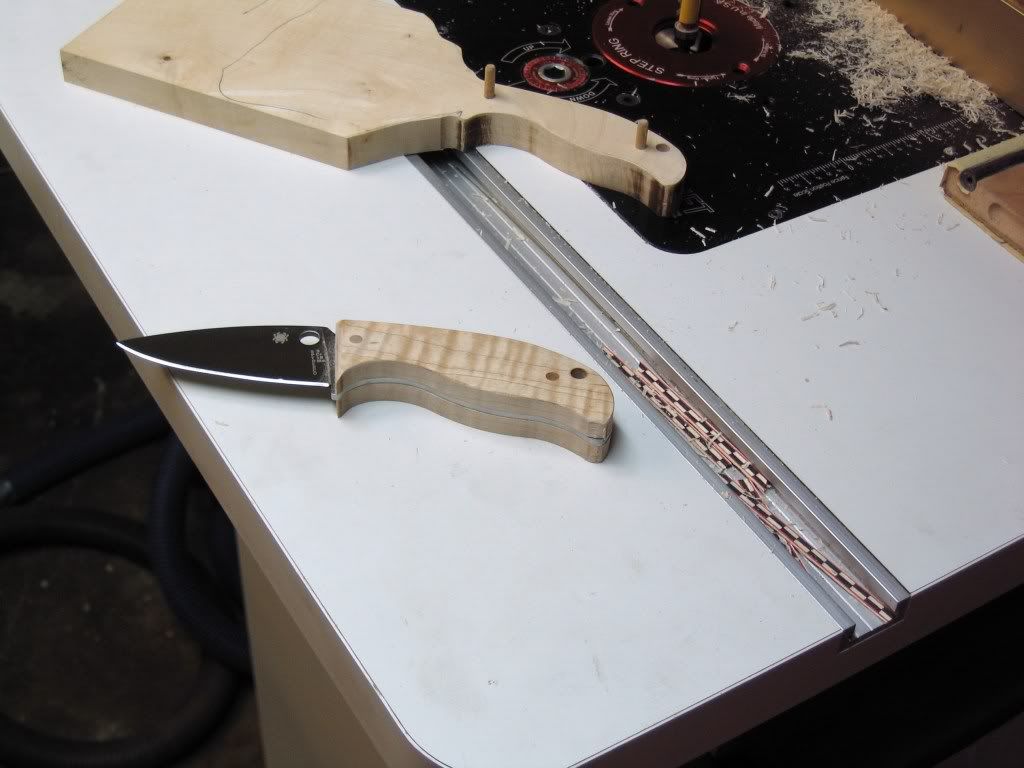
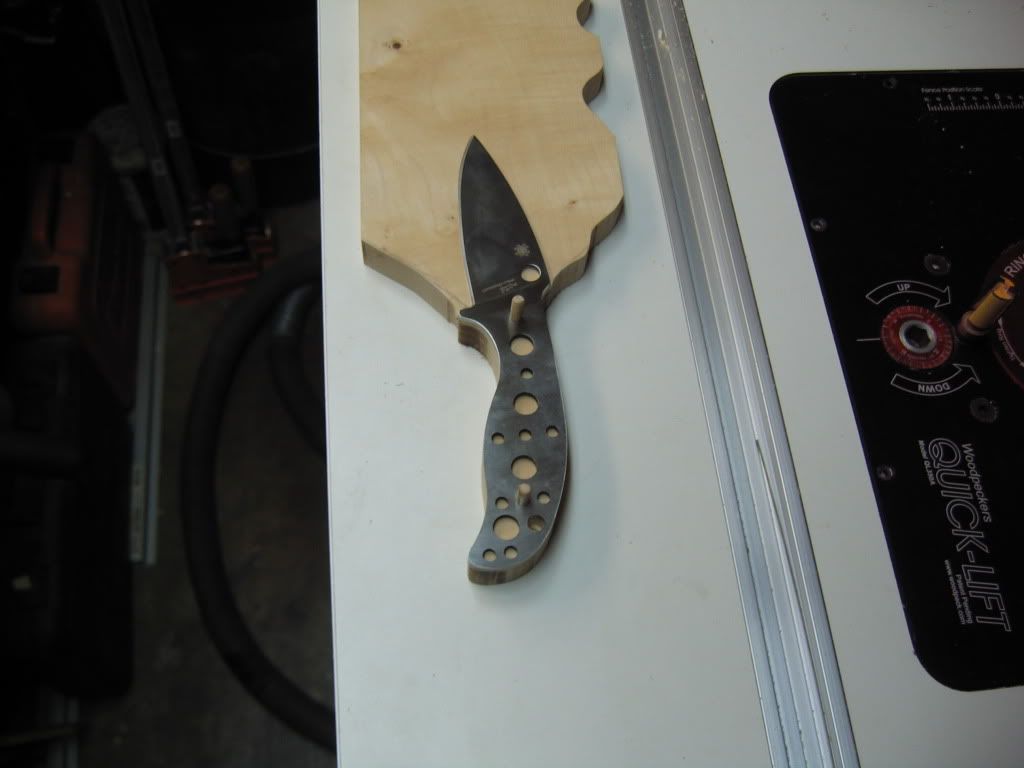
Template is now cut and matches the knife tang!!!!
Image
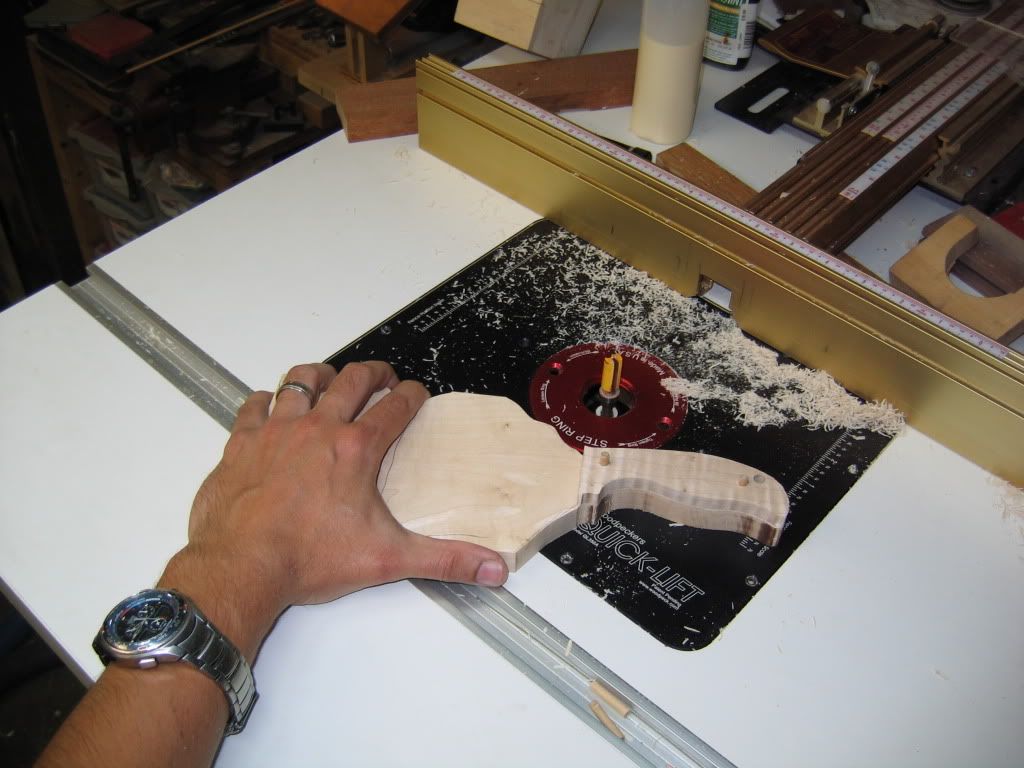
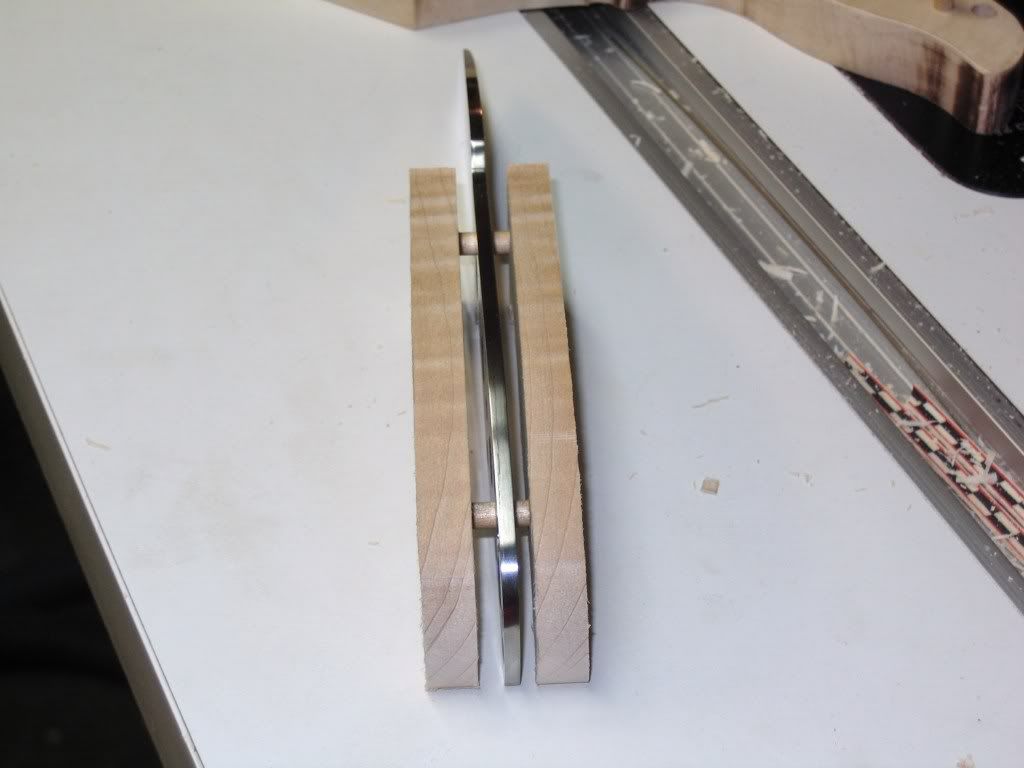
Last picture shows the template bit that is used to cut scales. The lower bearing rides on the template, and the upper blade cuts the scale.

Image
User avatar
araneae
Member
Posts: 5492
Joined: Wed Aug 09, 2006 10:10 pm
Location: A lil more south of the Erie shore, Ohio

#2

Post by araneae »

Awesome thread!
So many knives, so few pockets... :)
-Nick

Last in: N5 Magnacut
The "Spirit" of the design does not come through unless used. -Sal
oregon
Member
Posts: 1141
Joined: Sat Jun 10, 2006 6:44 pm
Location: Oregon

#3

Post by oregon »

Thank you kindly Hector for the tour de force pictorial of the mule meets router. Your hard work is much appreciated: You have opened my eyes wide and I am in your debt.

Do you use any specialized tools to push/guide the target past the router bit?

All the best,

oregon
User avatar
anti-torsion
Member
Posts: 197
Joined: Fri Jul 10, 2009 8:41 pm

#4

Post by anti-torsion »

Looks good, along with that curly maple checker board
Ed Gordon
Member
Posts: 63
Joined: Fri Sep 24, 2004 10:33 am

#5

Post by Ed Gordon »

Good thinking! I can do this!! thanks again
User avatar
FIMS
Member
Posts: 990
Joined: Mon Oct 19, 2009 9:41 pm
Location: Toronto, Ontario, Canada.

#6

Post by FIMS »

You make it look way to easy.

However I know it isn't.
Oderint Dum Metuant - Let them hate, so long as they fear.

:spyder:'s - I have sincerely now lost count.

http://www.spydiewiki.com/
http://spyderco.com/edge-u-cation/glossary.php
User avatar
psimonl
Member
Posts: 1948
Joined: Thu Jan 27, 2005 3:13 pm
Location: Montreal Qc Canada

#7

Post by psimonl »

Then what.... You cut the wood in half to the two sides or mak another one just like it???

I like it when you answer with pictures ;)

SImon
"Everyday above the ground and vertical is a good day".
-Sir A. Hopkins in "The world's Fastest Indian"

"If it hurts, it means you're not dead..."
-Kayakist Marie-Pier Cote

The Spyderco Cookbook
Hector Castro
Member
Posts: 411
Joined: Fri Sep 11, 2009 7:26 pm
Location: DFW Texas

#8

Post by Hector Castro »

psimonl wrote:Then what.... You cut the wood in half to the two sides or mak another one just like it???

I like it when you answer with pictures ;)

SImon
The next thing to do, is drill holes in your scale material. These holes line up with the two pins. Use the knife's tang to do this. Then put that piece on the template and router around it. More pictures to come!

hmmmm, maybe I will go do a test run real quick and take some pics.. I have lots of scrap wood.
Hector Castro
Member
Posts: 411
Joined: Fri Sep 11, 2009 7:26 pm
Location: DFW Texas

#9

Post by Hector Castro »

Ok time me, it took 40 minutes and that included stopping to take pictures!
Hector Castro
Member
Posts: 411
Joined: Fri Sep 11, 2009 7:26 pm
Location: DFW Texas

#10

Post by Hector Castro »

Here are the pics of making the scales!

I chose a piece of scrap wood and layed the blade on it, to line up the grain

Image

Off to the drill press to punch the first hole and insert a pin, before I drill the second hole.

Image

Insert a pin in the second hole and you are ready to drill the lanyard hole. 1/4 bit is used for this.

Image

Blade is traced around, to cut on the band saw!

Image

Scales are cut out on the band saw, to a rough shape.

Image

I took the 3/4 rough blank and split is on the big bandsaw. Now I have two scales that are 3/8" thick. BTW I think 3/8 is way to thick for this knife. This is used for an example.

Image

Rough cut blank is mounted to template and ready to be routed. You should notice the two small notches in the top of the template. Those are finger grips for using the template!

Image

Holding template to demonstrate how it is used!

Image
Hector Castro
Member
Posts: 411
Joined: Fri Sep 11, 2009 7:26 pm
Location: DFW Texas

#11

Post by Hector Castro »

First scale is finished and matches template. Rough scale waits in anticipation to look as good!

Image

Blade sitting between finished scales, 3/16 dowels used to temperarly hold blade.

Image

Top view with scales

Image

Semi finished view. Sanded with 180 grit to make grain look good and dowels flush. This obviously needs to be expoxied for permanent use. Once again, these are just scrap wood scales. This wood is unstablized. They are too thick, and one has a chip out of the back of the tang. (note to self- slow down while feeding into router)

Image

OK,

now fire away with questions!
Hector Castro
Member
Posts: 411
Joined: Fri Sep 11, 2009 7:26 pm
Location: DFW Texas

#12

Post by Hector Castro »

Same template can be used for multiple pin locations. Other holes would have to be drilled into the template, and the pins moved!
Hector Castro
Member
Posts: 411
Joined: Fri Sep 11, 2009 7:26 pm
Location: DFW Texas

#13

Post by Hector Castro »

anti-torsion wrote:Looks good, along with that curly maple checker board
Thank you,

Chess board is my 4th one to make. This one will finally stay with me. Other 3 sold as fast as I could make them.
User avatar
Brad S.
Member
Posts: 1126
Joined: Thu May 17, 2007 12:06 am
Location: Tucson, AZ
Contact:

#14

Post by Brad S. »

Great job! Thats how Ive made everyone of my mule handles so far!
Brad Southard

Southard Knives

"Whatever you do, work at it with all your heart, as working for the Lord, not for men," Colossians 3:23
Marion David Poff
Banned
Posts: 723
Joined: Fri Sep 24, 2004 10:33 am

#15

Post by Marion David Poff »

Nice.

A great tutorial.

Marion
Marion David Poff
FLYcrash
Member
Posts: 233
Joined: Tue May 22, 2007 6:42 pm
Location: Chicago

#16

Post by FLYcrash »

Thanks for taking pics, Hector! They cleared up my earlier questions about your method.
Hector Castro
Member
Posts: 411
Joined: Fri Sep 11, 2009 7:26 pm
Location: DFW Texas

#17

Post by Hector Castro »

Tricod wrote:Great job! Thats how Ive made everyone of my mule handles so far!
Brad,

Thanks for the kind words. That means a lot coming from you.
User avatar
whkento
Member
Posts: 219
Joined: Thu Jan 24, 2008 12:23 am
Location: Nagoya, Japan

#18

Post by whkento »

Wow, great tutorial! Thanks for the pics. Now, can I borrow your entire shop for a couple of days? ;) (I wish I had those tools...maybe someday.)
User avatar
JNewell
Member
Posts: 5060
Joined: Fri Sep 24, 2004 10:33 am
Location: Land of the Bean and the Cod

#19

Post by JNewell »

I hope this won't be taken amiss - I just want to caution folks that router tables call for very, very careful use. The damage you can do to yourself makes knives look like children's playthings. In less than a blink of an eye a cutter doing maybe 50k rpm will turn your fingers into vapor and pulp.
Hector Castro
Member
Posts: 411
Joined: Fri Sep 11, 2009 7:26 pm
Location: DFW Texas

#20

Post by Hector Castro »

JNewell wrote:I hope this won't be taken amiss - I just want to caution folks that router tables call for very, very careful use. The damage you can do to yourself makes knives look like children's playthings. In less than a blink of an eye a cutter doing maybe 50k rpm will turn your fingers into vapor and pulp.
<font color="red"><font size="5"><BLINK>This safety message was brought to you by JNewell! </BLINK></font></font>
All kidding aside. JNewell is correct. If you have never used a router, it can be a very dangerous tool if used incorrectly! This process is not very feasible without a router table and proper made jig.
Post Reply