Show your mods!

A place for you to post your pictures of Spyderco knives. Read Announcement before posting!
User avatar
jackknifeh
Member
Posts: 8412
Joined: Fri Jul 09, 2010 6:01 am
Location: Florida panhandle

#1881

Post by jackknifeh »

Jazz wrote:Jack, that Dfly is sweet. The contrasting backspacer really sets it off.

Ourgon, love that Endura.
Thanks Jazz. One thing I've been wanting to mention about the one-piece handles. You can put or leave out the clip and/or lanyard hole. By leaving the lanyard hole out you can put the clip as high as you can for a very low riding knife in your pocket. Debating on putting the clip on this handle.

Jack
User avatar
phillipsted
Member
Posts: 3674
Joined: Tue Oct 05, 2010 11:30 am
Location: North Virginia

#1882

Post by phillipsted »

Nice work, Jack! It took me a minute to register that this knife started life as an FRN DFly! I thought for a couple of minutes that it was a rescaled G10 model. I'm liking this mod a lot!

(BTW, I spotted the "flaw" you were talking about, but I'll leave it up to someone else to say something... Otherwise, it is *perfect* ;) )

TedP
User avatar
Donut
Member
Posts: 9613
Joined: Sat Sep 05, 2009 5:47 pm
Location: Virginia Beach, VA, USA

#1883

Post by Donut »

Is it that the right hand scale is smaller at the end furthest from the blade? (Seen in the third picture.)

It looks like you changed the profile of the handle. One of my favorite features of the Dragonfly is the angle at which my pinky finger lies on the scale.
-Brian
A distinguished lurker.
Waiting on a Squeak and Pingo with a Split Spring!
User avatar
jackknifeh
Member
Posts: 8412
Joined: Fri Jul 09, 2010 6:01 am
Location: Florida panhandle

#1884

Post by jackknifeh »

Donut wrote:Is it that the right hand scale is smaller at the end furthest from the blade? (Seen in the third picture.)

Yes. This is caused when shaping the outside of the handle the Dremel is not at a 90° angle with the deck. See below.
Image

Image


looks like you changed the profile of the handle. One of my favorite features of the Dragonfly is the angle at which my pinky finger lies on the scale.
I left the rear end of the handle wider (not thicker) for a bit larger end. I did this mainly so if I put a clip on it I have a little more room to make it really deep if Ileave out the lanyard hole.

But the flaw that I was actually talking about is the right scale is a tiny bit thicker than the left. This wasn't obvious to the naked eye until after I used the chamfer router bit on the edges. It took an issue that I couldn't see and made it more obvious. It's more apparant in the hand than in a picture. Easily fixable though.

Jack
User avatar
razorsharp
Member
Posts: 3069
Joined: Wed Mar 16, 2011 9:41 pm
Location: New Zealand

#1885

Post by razorsharp »

Image
Reground southard
User avatar
razorsharp
Member
Posts: 3069
Joined: Wed Mar 16, 2011 9:41 pm
Location: New Zealand

#1886

Post by razorsharp »

Image

Image

Regrind, Horizontal satin, satin clip and heat anno to liner an Ti
RoBoTech
Member
Posts: 319
Joined: Wed Jun 29, 2011 1:41 pm

#1887

Post by RoBoTech »

Just finished up a TI Military and Cru-Wear blade swap.
Scales, back spacer, and clip are orange peeled. Lock face has been Cabonized. TI clip has been drilled and tapped for tip up carry.
And a Cru-Wear blade from a Sprint has been swapped in. Now I consider this a hard use knife, and is in my pocket.

Image

Image

Image

Image

Image

Image

Image

I am now doing a Gold Anodized Fluted Ti. Just purchased a silver Fluted, new version. Sanded and polished the edges and groove tops. Flame ano'd the scales gold. Polished and flame colored the clip, and will do all the hardware the same, except the blade. Waiting for the custom standoffs and looking for someone to Carbonize the lock face and I forgot about the steel insert, and I am sure it softened from the heat when I flamed the scales.
Looking for a super steel blade. M4, M390, S90V, S10V. Will post that one when it's done. Here is a teaser.

Image
User avatar
Jazz
Member
Posts: 7678
Joined: Sun Jul 01, 2007 7:46 pm
Location: Alberta, Canada

#1888

Post by Jazz »

Robo, how do you get the orange peel texture? Is it just with polishing? Nice, by the way.
- best wishes, Jazz.
RoBoTech
Member
Posts: 319
Joined: Wed Jun 29, 2011 1:41 pm

#1889

Post by RoBoTech »

Jazz wrote:Robo, how do you get the orange peel texture? Is it just with polishing? Nice, by the way.
I did what the youTube vid of TuffThumbz had shown. I use a coarse wire wheel, then a light polish.
You can see it here.

Here are a couple more teasers on my Gold Fluted TI mod. Still waiting for new stand offs and a blade donor. Also trying to find someone to carbodize the lock face.

Image

Image

Image

Image

Will do a final post when I get all the stuff done.
User avatar
Holland
Member
Posts: 7571
Joined: Fri Jan 06, 2012 9:37 pm
Location: Alberta

#1890

Post by Holland »

That looks incredible robo!
-Spencer

Rotation:
Gayle Bradley 2 | Mantra 1 | Watu | Chaparral 1 | Dragonfly 2 Salt SE
RoBoTech
Member
Posts: 319
Joined: Wed Jun 29, 2011 1:41 pm

#1891

Post by RoBoTech »

Thank you!
know of anyone who has a carbonizing machine? I hate to buy one to do 2-3 projects.
If anyone knows, please PM me.
User avatar
phillipsted
Member
Posts: 3674
Joined: Tue Oct 05, 2010 11:30 am
Location: North Virginia

#1892

Post by phillipsted »

This is my latest Spyderco Slipit - a Wharncliffe Urban that was purchased used from one of the Forums. It had been lightly carried, but not sharpened by its original owner. I made a set of scales using a scrap piece of unstabilized rosewood from my local lumber dealer. Trimmed up the board then resawed some 0.125" scale slabs. I sanded them smooth by hand, drilled and counterbored the holes, cut out the profile using a coping saw, then shaped and contoured the scales using files and sandpaper. I finished them by sanding out to 1200 grit and applying 4 thin hand-rubbed coats of Tru-Oil. This was the first time I'd had trouble with Tru-Oil adhering to an oily dense wood like rosewood. After the first coat, I had to sand it back and reapply using a new bottle. The subsequent coats went on smoothly, but I ensured that I rubbed the Tru-Oil in very thin coats and worked the oil into the pores well. It still isn't perfect, but I learned a lesson that I tried on a piece of left-over scrap wood. Next time, I'm going to apply a couple of base coats of Tru-Oil sanding sealer to seal the grain before applying the Tru-Oil as a top coat.

Cheers!
TedP

Image
Image
Image
Image
Image
Image
Image
Image
User avatar
Spydersense
Member
Posts: 1431
Joined: Mon Jan 20, 2014 4:07 pm
Location: Wilsonville, Oregon

#1893

Post by Spydersense »

Another great piece Ted. Nice work!
Time for another :spyder:!

-Matt
User avatar
Jazz
Member
Posts: 7678
Joined: Sun Jul 01, 2007 7:46 pm
Location: Alberta, Canada

#1894

Post by Jazz »

Nice, Ted. Looks so smooth.
- best wishes, Jazz.
User avatar
USNGMG2
Member
Posts: 3
Joined: Thu Mar 06, 2014 5:05 pm
Location: NE USA

#1895

Post by USNGMG2 »

I modified the Superleaf due to someone else's poor attempt. The blade was convexed, the spine now has a bevel and the top plunge line moved to the rear. The blade was polished to 800 grit. The handle was modified fore and aft.

Image
Image
Image
Image
Image
User avatar
MadRookie
Member
Posts: 784
Joined: Fri Jan 06, 2012 7:03 am

#1896

Post by MadRookie »

Nice work there Ted!

Wooden scales always seems to warm up a knife a notch or two.

:)
User avatar
jackknifeh
Member
Posts: 8412
Joined: Fri Jul 09, 2010 6:01 am
Location: Florida panhandle

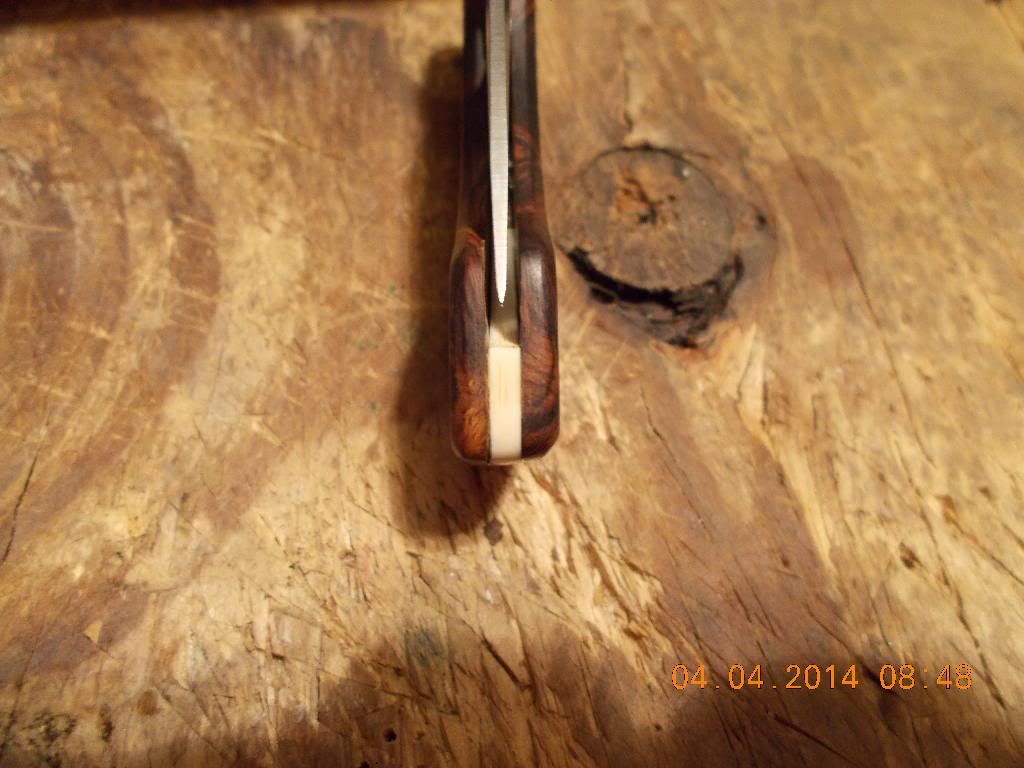
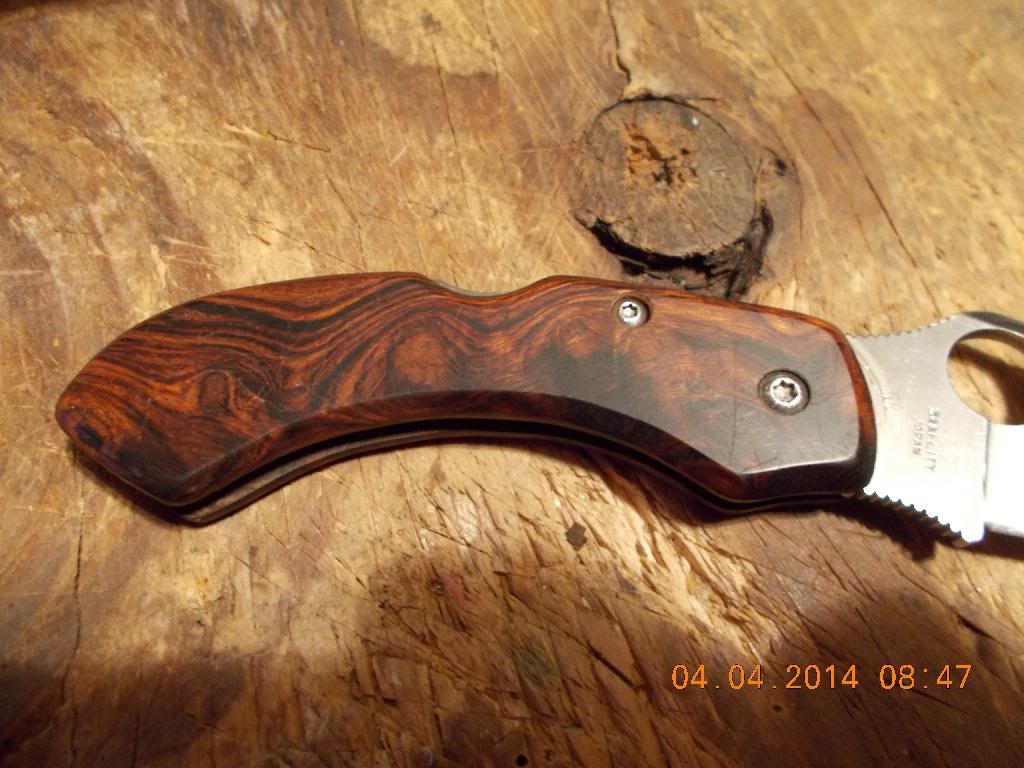
Backspacer on my D'fly 2 ironwood handle broke (sad face)

#1897

Post by jackknifeh »

I made this handle with ironwood handle with a birchwood back spacer. The bottom of the backspacer where the lock spring applies pressure broke off inside the handle. I don't think I used enough epoxy right there. I was afraid if I used too much it would squeeze out into the lock spring slot. After it dried I wouldn't be able to insert the lock spring. This time on the new back spacer I made sure I had enough epoxy there as well as I drilled a couple of real small holes through the backspacer under the lockspring slot and into the side of each scale. With the epoxy going all the way through I'm hopeing it will act like a tiny metal rod increasing strength. Anyway, this time I used elephant ivory for the new backspacer. Sorry elephant. I had a small piece in with a bunch of pieces given me by a forum friend. I think it looks pretty good. I hope it lasts forever. This handle may have a super blue blade in it some day. :)

Here is the new backspacer from the top.
Image

This is the bottom.
Image

This is the handle if you forgot. They don't show up as clear in the picture but this handle is getting quite a few tiny scratches from use and being in the pocket. Character,,, right? :)
Image
User avatar
xceptnl
Member
Posts: 9000
Joined: Mon Feb 21, 2011 6:48 pm
Location: Tobacco Country, Virginia
Contact:

#1898

Post by xceptnl »

I think the Ivory and the scratches enhance the character Jack. Now you need to mirror polish that blade and fully crown the spine.
Image
sal wrote: .... even today, we design a knife from the edge out!
*Landon*
User avatar
jackknifeh
Member
Posts: 8412
Joined: Fri Jul 09, 2010 6:01 am
Location: Florida panhandle

#1899

Post by jackknifeh »

xceptnl wrote:I think the Ivory and the scratches enhance the character Jack. Now you need to mirror polish that blade and fully crown the spine.
Sounds like a challange to me! I'll give it a try. Bet it would look good. Give me 3 minutes. :rolleyes: :)

Jack
User avatar
xceptnl
Member
Posts: 9000
Joined: Mon Feb 21, 2011 6:48 pm
Location: Tobacco Country, Virginia
Contact:

#1900

Post by xceptnl »

jackknifeh wrote:Sounds like a challange to me! I'll give it a try. Bet it would look good. Give me 3 minutes. :rolleyes: :)

Jack
Go...
Image
sal wrote: .... even today, we design a knife from the edge out!
*Landon*
Post Reply