Show your Mule

-
Bladekeeper
- Member
- Posts: 936
- Joined: Fri Sep 07, 2012 7:24 pm

Here's a sheath for my Mule. This one is the ebony grip with a simple leather sheath. Decided to keep it simple on this one, just lined tooling leather with attached belt loop on the back. The retention is from forming on the grip and molding, no fastening involved, but it holds well enough with the knife upside-down.

-
Sharktooth

- Member
- Posts: 80
- Joined: Sun Sep 23, 2012 10:29 am
- Location: Canada
- Contact:

Nice! Do you have trouble with cutting the sheath as you put the knife in and take it out (cutting the molded portion around the handle)?noseoil wrote:Here's a sheath for my Mule. This one is the ebony grip with a simple leather sheath. Decided to keep it simple on this one, just lined tooling leather with attached belt loop on the back. The retention is from forming on the grip and molding, no fastening involved, but it holds well enough with the knife upside-down.
Do no harm. Do know harm.
So far, no trouble at all, but I'm very careful. It is certainly sharp enough that a careless bit of pushing would cut the leather. As long as I do my part, it works well. I think the first time I'm in a hurry, I'll be making another sheath on this one, as the steel is very hard and very sharp. I didn't go to a polished edge, just a fine diamond which is a bit long in the tooth at 15 degrees per side, but seems to be plenty good enough. I'm looking forward to seeing how long this edge holds up for general use, but it should be a good long while.
This is my first Mule run, but I really like the ergonomics incorporated in the design. It is simple, compact & elegant, all at the same time. Looking forward to the next run already.
This is my first Mule run, but I really like the ergonomics incorporated in the design. It is simple, compact & elegant, all at the same time. Looking forward to the next run already.


-
phillipsted

- Member
- Posts: 3674
- Joined: Tue Oct 05, 2010 11:30 am
- Location: North Virginia
-
kennethsime

- Member
- Posts: 4790
- Joined: Thu Dec 29, 2011 8:28 pm
- Location: California
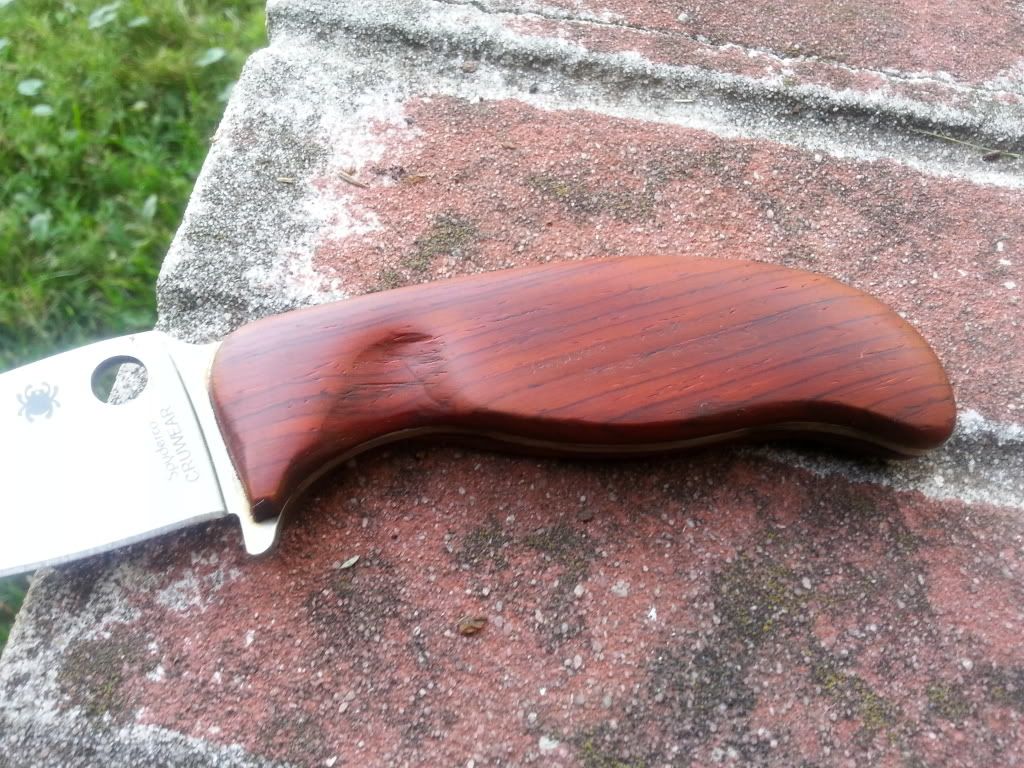
Just finished the B75P mule project. Dressed in bubinga with green liners. I used hidden brass 3/16 pins covered by stabilized box elder inlays with a brass lanyard hole. I still need to complete the finish but I really like the look of the bubinga finished and un-finished so I thought I would post the pre-completed picture.
- Attachments
-

-
Bladekeeper
- Member
- Posts: 936
- Joined: Fri Sep 07, 2012 7:24 pm
-
Bladekeeper
- Member
- Posts: 936
- Joined: Fri Sep 07, 2012 7:24 pm
This was completed for me today a S30V woodcraft in English Walnut burl sorry I don't have ability to post pictures please follow the link though .
Any comments welcome thanks all kindly finished by Quickbeam a bb member I think he's done a great job will have it this week .
http://www.britishblades.com/forums/sho ... derco-Mule
Any comments welcome thanks all kindly finished by Quickbeam a bb member I think he's done a great job will have it this week .
http://www.britishblades.com/forums/sho ... derco-Mule
I feel like a hack even posting this in present company but it is what it is. In my defense this was the first time I've ever worked with wood period, and basically used only a Dremel and hand tools. It feels great in the hand it just isn't so pretty. I actually finished it months ago and ended up putting it in a box and thinking I wasn't going to use it until I found a sheath. Well I came upon it today by accident so I figured I'd share. The good news is I learned a lot and am ready for another try.
Hey, they're all just practice & Rome wasn't built in a day. Good job on even trying to do one! If you want it done differently, it looks like there's still plenty of wood there to re-shape a bit on the edges, round a bit more and change the contours. Tape the blade to avoid cuts and scoring the blade, use a sanding block (a rubber one, small) and some finer paper. You already have the shape correct, the rounding can still be done at this point & after all, it's just wood! First attempt, thumbs up.
-
Bladekeeper
- Member
- Posts: 936
- Joined: Fri Sep 07, 2012 7:24 pm
That's the thing you've learnt and will improve if the MT were cheaper here I'd give it a go instead of getting others to scale them for me.Rwb1500 wrote:I feel like a hack even posting this in present company but it is what it is. In my defense this was the first time I've ever worked with wood period, and basically used only a Dremel and hand tools. It feels great in the hand it just isn't so pretty. I actually finished it months ago and ended up putting it in a box and thinking I wasn't going to use it until I found a sheath. Well I came upon it today by accident so I figured I'd share. The good news is I learned a lot and am ready for another try.
With the cost of importing buying stabilised wood , pins and liners it'd be a $200 mistake here so I chicken out and that's not a bad effort there bud.
Success is going from failure to failure without loss of enthusiasm (not saying its a failure but your not happy) keep at it fella
A good quote that goes hand in hand with this is "Sucking at something is just the first step in becoming great at it!"Bladekeeper wrote: Success is going from failure to failure without loss of enthusiasm (not saying its a failure but your not happy) keep at it fella.
And RWB1500, you appear to have skipped the first step and gone straight to being pretty good at it, so you're already ahead of the quote! Keep at it!