"Your body may be gone, I'm gonna carry you in.
In my head, in my heart, in my soul.
And maybe we'll get lucky and we'll both live again.
Well I don't know. I don't know. I don't know. Don't think so."
- Modest Mouse "Ocean Breathes Salty"
Wow! Some really spectacularly good work showing here :)
My efforts so far:
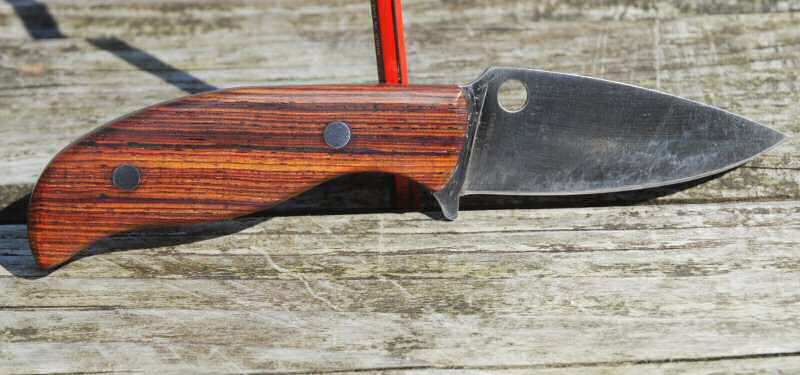
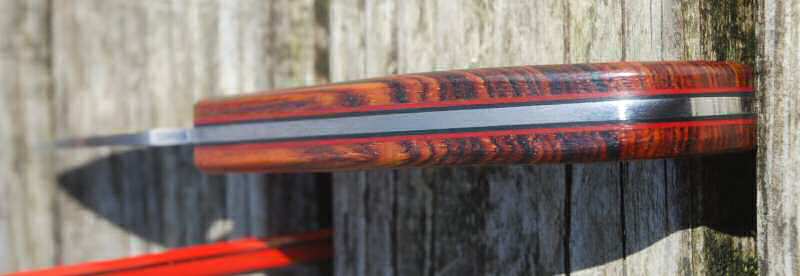
52100,, cocobolo, stainless Corby bolts, red/black fibre liners. Photos taken after a weeks holiday with it, using it for food, carving and cutting stuff in general - 52100 takes on a patina if you look at it funny... This one has since had it's guard removed for easier carving - it has had the local Scouts using it while learning how to carve spoons .
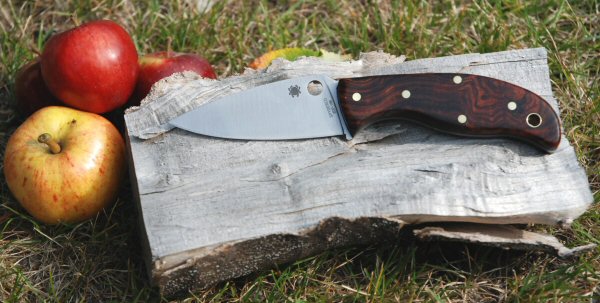
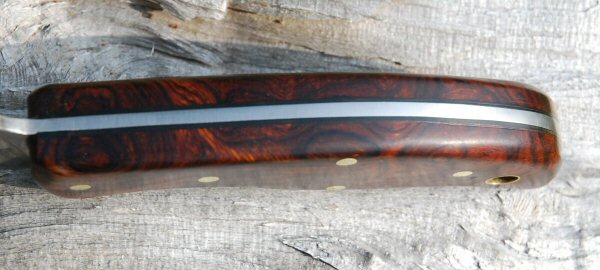
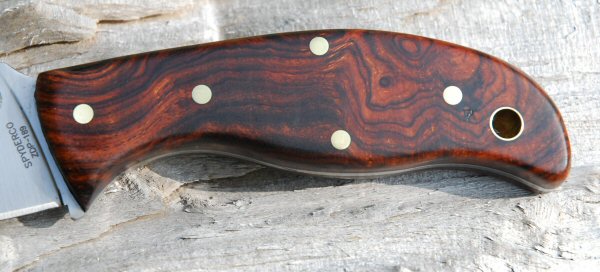
ZDP189, Desert Ironwood, black fibre liners, brass pins and tube. Shortened guard.
Hector Castro wrote:I was thinking of using my router and a template bit with a bearing to make scales. I would mount a thick block of wood to one side of the mule to make a nice fitting blank/pattern to work off of. Cut it out on the bandsaw so it is close, then sand it the rest of the way,to match the handle.
Then I could just use this on the router table with the template bit to cut all my material to shape. I purchased 5 of the current mules to play with. I am and advid wood worker, so I think this knife project is right up my alley!
If you go by this route, you'll find the challenge to be getting the holes in your scales to match the pin holes in the tang. Best of luck!
FLYcrash wrote:If you go by this route, you'll find the challenge to be getting the holes in your scales to match the pin holes in the tang. Best of luck!
Flycrash,
I have thought of that. That is the reason I will incorporate pins into my template. The template will have pins that hold the blade in the proper position. The template bit will also have an oversized bearing to incorporate an additional 32nd of material into the scales, to allow for any errors in the knife itself. (Hole alignment)
I will drill the holes first, into the blank material, then run it on the template at the router table.
I am also a woodworker, and agree with your thought process. I ended up just cutting out scales with my band saw, attaching to the mule and using a drum sander to finalize. The reason I did this was I didn't like the scratch patter of the original cut out on the tang, so, I killed two birds with one sander Another note, watch handle shape, etc, as there are slight variations between mule runs, my zdp has a different shape then an s90v right by the thumb ramp, but all part of the same run should be fine.
Thank you for seeing things like I do. Thanks for the tip on the handle variation. I will verify that all 5 of mine are alike, before I finalize the template.
Thank you for seeing things like I do. Thanks for the tip on the handle variation. I will verify that all 5 of mine are alike, before I finalize the template.
I was just about to say the same thing as anti torsion-I was woodworking long before I was knifemaking and it's much easier to just cut the scales with a bandsaw or scroll saw, attach them, and then sand them down with the drum or spindle sander. That way you save time by not having to cut them exactly accurate and sanding the metal tang at the same time to get rid of scratches. I've thought about using the router in handle making but it adds on time plus it's not the safest thing to be routing such small pieces anyways.
I have thought of that. That is the reason I will incorporate pins into my template. The template will have pins that hold the blade in the proper position. The template bit will also have an oversized bearing to incorporate an additional 32nd of material into the scales, to allow for any errors in the knife itself. (Hole alignment)
I will drill the holes first, into the blank material, then run it on the template at the router table.
Do you see any reason this will not work?
Sorry to keep derailing a picture thread, but I guess my issue is I don't know how woodworkers drill holes so precisely that the holes in the blank match up exactly with the holes in the tang. Getting the final shape by sanding the assembled knife is simple once this is figured out. For my denim Mule, I used a mill with a digitial xy readout to match the hole spacing on the tang (which I measured with a caliper). But I'm lucky enough to have access to a student machine shop. It sounds like you also manage to drill the holes precisely but without a mill. How?
FLYcrash wrote:Sorry to keep derailing a picture thread, but I guess my issue is I don't know how woodworkers drill holes so precisely that the holes in the blank match up exactly with the holes in the tang. Getting the final shape by sanding the assembled knife is simple once this is figured out. For my denim Mule, I used a mill with a digitial xy readout to match the hole spacing on the tang (which I measured with a caliper). But I'm lucky enough to have access to a student machine shop. It sounds like you also manage to drill the holes precisely but without a mill. How?
Actually it's fairly simple to drill the holes accurately. Clamp one side of the scales onto the tang and use the tang as a template when drilling the holes. I've never gone wrong with that method. I don't see why anyone would want to do it any other way...no matter how much measuring you do you might be off by a hair. Using the tang as a template is practically foolproof.
raythebigfoot wrote:Actually it's fairly simple to drill the holes accurately. Clamp one side of the scales onto the tang and use the tang as a template when drilling the holes. I've never gone wrong with that method. I don't see why anyone would want to do it any other way...no matter how much measuring you do you might be off by a hair. Using the tang as a template is practically foolproof.
Ray,
I cannot agree more. Drill the holes with the tang as a guide, then drop the drilled scale onto the template with pins, and router around the thing, perfect fit.
Flycrash,
A flush cut router bit, has a bearing on top. The bearing rides along the original pattern and makes the second piece match the pattern... Does this make sense. look here to view the bit! this may give you a better understanding on how this works. I promise to take pictures after I make the template and scales...
Hector Castro wrote:Flycrash,
A flush cut router bit, has a bearing on top. The bearing rides along the original pattern and makes the second piece match the pattern... Does this make sense. look here to view the bit! this may give you a better understanding on how this works. I promise to take pictures after I make the template and scales...
Oh, I see! So to do the holes, you choose a bit narrower than the desired hole, rough drill a pilot hole in the handle to fit the bit, and then enlarge it with the flush cut bit to match. Thanks for being patient with me. I have very little experience with routers. :)
BTW, folks, beautiful Mules! It amazes me how many people can turn out perfect little works of art with wood, cord, or composites. And I love the idea of glow-in-the-dark liners!
How about showing a dozen? I'm just getting around to starting handles on these. I'll update as I get them done. They have Micarta, G-10, wood, Kydex and leather in their future.
The idea is to get them done by Christmas...I'll be trying.


